What To Do With Lots of Fabric and New Friends!

by Heidi Weiss Emmett

Lot’s of fabric and new friends plus a great place to stay equals MAJOR SEWING FUN!! And that’s what I did at Harmony Ridge Lodge in Nevada City, CA There were 9 of us. I knew 2 of the group (my Portland, Oregon friends KarenAnne and Linda). All the rest were from the Portland area and into Washington state. All 8 of these lovely ladies DROVE all the way. I was super blessed to be a part of this group and I only live 11 minutes from this Lodge. But of course, I couldn’t miss a thing! So I had a sleeping room there too.

All 8 women have high-powered careers in the health-care field. Sewing for fun AND 5 days in a ROW is UNHEARD of!!

First up we have Nancy. This the VERY FIRST machine quilted piece she has ever made. It’s a Christmas tree skirt. The colored fabrics are “pieces of candy.” See the twisties at each end. She did a beautiful job and is excited to create more quilts and getting back to sewing clothing as well.

This is Jan with her “coin” quilt. She used all Marcia Derse fabrics. She made another quilt top too.

Linda with her first finished quilt top ON THE FIRST DAY no less! I love the “pop” of my favorite shade of green that floats here and there throughout this top.

Rosemary shows off her first quilt top of the week. I can’t pick a favorite print in this one. I love them all. She went on to CUT OUT and COMPLETE TWO MORE quilt tops. Both, larger tops, as in queen size.

Kelsey is showing us her 2nd finished quilt top. She went on to a third and partially a FOURTH!! Unbelievable. This is a VERY FOCUSED group.

I lost track, were there 4, maybe 5 of these cute Janome, RED, sewing machines? Perfect traveling weight (not the usual 35+ lbs) and everyone agreed, easy learning curve for usage. My friend Linda, she is a great salesperson when it comes to these babies. She should get a commission.

I have heard about these “pin cushions.” Just throw your pin at it and they automatically land pinhead out for easy pickup. Hmmm…accurate, 98% of the time. Ha,ha.

This puppy (Rowenta iron), stole the show. Nicole brought it along with the matching ironing board. Yes, she brought tons of stuff , including gobs of fabulous vegetables and fruits from her own garden. Did you know there are 5 different Frizee’ lettuces available? Haha, I’ve never heard of one of them! Delicious they were. AND she literally brought a bushel of apples! El Star is their name. AMAZING apples.

I am in LOVE with all fabrics Aboriginal. I want to copy this quilt. It would be a way to look at all my pieces at once. You can see KA’s happy smile that she finished this quilt top (look at the tippy top of the picture).

Here is KA herself and her Aboriginal quilt on the ironing board is getting a pressing before adding another outside border. And there is that AMAZING iron. We all want one of those. Nicole said she purchased it as a “refurbished” iron on Amazon. Check out KA’s adorable shibori top that she purchased at J.Jill (rats, 2yrs. ago). I could make that! Do you and your stitching friends say that too? Sigh….

This is a close up of her jeans that she is also wearing. What a great idea she had to slow stitch all of that after adding a piece of turquoise linen behind the rip in the jeans. I’m so going to do this. Haha, I can’t believe it. I checked out my jeans and I will have to CREATE A RIP first. Haha.

Time for a commercial break. It’s a good one. Yet ANOTHER way to change up your COZY! Learn more about the COZY sewing pattern by going to my Etsy shop: DesignsbyHeidiEmmett I’d offer a link but it’s on the fritz today. Grrr….

KA (Karenanne) told me she had a summer version of COZY. She brought it to the retreat. I’m wearing the “Cover COZY and KA has on her summer version. This picture gives you a great side by side comparison of the COZY. I mention some ideas for making your COZY smaller in the pattern itself. I think you can see the basics on that in this picture. Shorten the overall length, take in the sides. Trim the depth of the sleeves and take it in on center back and the center front. And check out our “digs” It’s like this all over the property.

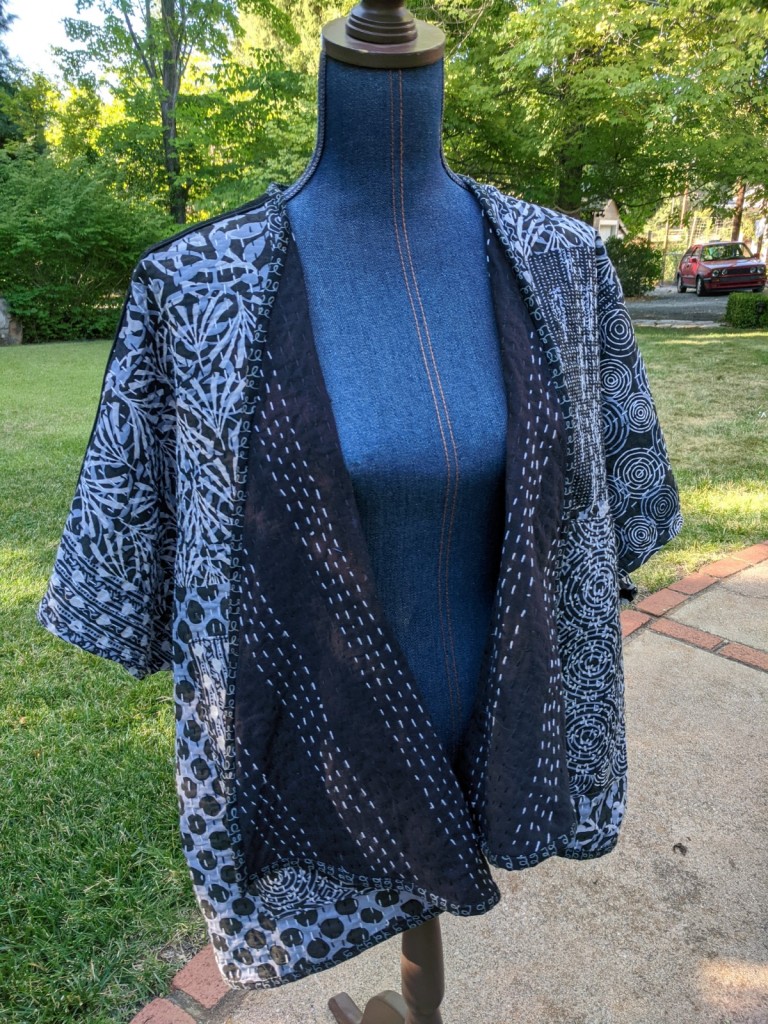
I love this look and KA says it is really cool and comfy. She removed the collar piece and the pockets also. You would never know that this started out as a COZY.

A close up of this beautiful piece of fabric. It reminds me of “ice-dyeing.” Someday, I need to try that again. It was fun and fast. If you don’t know what it is, just look it up on Pinterest, Instagram, etc. There are many more great pictures of this sewing adventure but they will have to wait for a future post.

So much fun we all had on this 1st annual “Quilt Camp.” After the first full day of FUN, everyone said can we do this again next year. One change would be maybe only 1, past midnight staying up, NOT ALL 5!! Yowzaa, it’s a been a full week that I made the l-o-n-g drive home (haha, as in 11 minutes remember?) and I am STILL catching up on my sleep. Take care now all of you, my fabulous followers of this newsletter/blog. Invite your friends to join in the fun of my weekly posts. Tell them to follow me on Designsbyheidi.wordpress.com Hugs, Heidi

Sew, Can You Tell Me What This Is? Another in the Series, “A This and That Friday.”

By HEIDI WEISS EMMETT

I found this beauty at, where else, my local Thrift Shop.

Beautifully crocheted, pretty colors, reminds me of a piece of Coral.

Lots of ruffles. Here is a peek underneath a ruffle.

See the ring in the middle? Hold “it” up by that ring and I guess you could put it on a hook?! Can’t wait to hear what you all think this is.

I have a friend, Tina Murray Bosh. She does a “Sunday Art Share” almost every Sunday afternoon. I love them. Find her on Facebook under her name, Tina Murray Bosh. This particular Sunday Art Show Tina created, maybe a month ago. The Artist, is leaning against a birds leg. Read on (Tina’s writing) and more pictures will follow.

Sunday Art Share….I love books and I love birds. “Books of a Feather” features a trio of bird friends. They stand in front of the Alice McKean Young Neighborhood Library, 5107 Griggs Rd., Houston, TX

Created by Dixie Friend Gay, the Houston-based artist covered the 15-foot concrete and stainless-steel bodies with thousands of pieces of multi-colored glass and ceramic mosaic tiles, creating arcs of colors and patterns that capture the movement of feathered plumage rippling in the wind. Hand made ceramic tiles were stamped with book titles that include words associated with birds and flight. Including One Flew Over the Cuckoo’s Nest, The Pelican Brief, and The Trumpet of the Swan, the tiles wrap around the birds in ribbon-like fashion. The artist draws parallels between the physical flight of birds and flights of imagination found in books. “The free movement of birds stretches our imagination towards a world that exists beyond our vision, just as explorations in the library open our minds to new and unfamiliar views.”

What an amazing way to welcome visitors to the library. Each of the birds has anthropomorphic eyes, giving it its own unique personality. In fact the one with a red head looks a bit grumpy to me.

15 foot concrete and mosaic bird created by Dixie Friend Gay of Houston Texas.

Oh my, what FANTASTIC yard art one of these would be! I told my husband that and he just laughed and laughed.

Such unique materials used in each bird.

So amazing, each of these. I don’t know which one is my favorite.

O.K., I love this! I bought the T-shirt that this is on. It is a child size T-shirt.

Yes, I bought this Upcycled T-shirt dress for the butterfly quilt square mainly. Yes, I want that pattern. I suppose I could have looked online for this pattern. It has to be somewhere. But, why not wear it in the meantime.

I’m sure I put this in another post, but who cares? You can enjoy seeing it again worn with something I would NEVER have thought of but I like it. Check out my fancy dangly earrings, and this beautiful scarf made of teeny-tiny yo-yos. O.K., good look so far. Maybe a silk shirt, and a swishy, dressy, skirt or pants to go with…

Whaaaat?!? Yep, it’s my upcycled sweat shirt layered over two longer close fitting tops. The strange, no, read that as, “unique” shapes on the front are two cuffs (now the sleeves are rolled up) and the center circle is the neck edge (awww….now I can breathe, it was tight to begin with). There is a fabric “secret pocket” sewn at an angle under the center circle. Whoops, you can see my proverbial Kleenex sticking out of the pocket. Underneath all the added pieces is a giant embroidered Bass Fish ( I didn’t want to cut it out, just work around it).

You can see the back here. Looking at it now, I think I will add more circles of running stitches. This piece (the white portion) is from a tank top. I stitched it down along the edges. I really like how the bottom edge rolls up just a little to reveal the white inside. And the neckline does the same thing. A really nice quality sweatshirt to begin with. I check every time I’m at a Thrift shop for good quality sweatshirts AND I find most of them in the men’s dept. This is your T.S. tip for the week. You need to be prepared. Read on about that.

I have plans to teach a class/ write a pattern/ maybe a you tube video. I Have 7 other sweatshirts in various degrees of creative items added to them. And tubs, and TUBS, of sweatshirts, washed and ready to go. 100% cotton or 80% cotton/20% poly sweatshirts are really nice to work with. I would love to hear if you think this would be something you would like to do, or not.

O.K. back to the yo-yo scarf. Each yo-yo measures 3/4″ at the radius. I believe they are all silk pieces. I absolutely LOVE, LOVE, this piece. Soooooo much hand work involved here. Easy work, but lots of it. Look up Clover for a yo-yo making tool. I own ALL the sizes of course. You can make yo-yo’s without a tool, but the tool is easy and fun to use, and…look below..

Here is the backside and they look pretty “wonky” which tells me they were made without a tool. Check out these beautiful prints, all silk, and go back up to see how cool they look on the “gathered” side. Check out Clover for some amazing tools to make sewing easier and more FUN!

I so appreciate your stopping by this week. Let’s all find a BIG chunk of time to be creative! Hugs and Blessings, Heidi

P.S. Art to wear sewing patterns at: Etsy.com/DesignsbyHeidiEmmett

Could it Really Be This Simple?

by HEIDI WEISS EMMETT

Are you like me and wear your scarves pretty much the same way?

This is a funny picture in that I have on, not one, but TWO cashmere sweaters. And then I pair them with a floral, spring scarf. It may be Spring on the calendar, but that particular morning (2 weeks ago maybe) the high for the day was 42 degrees with a chance of snow. I couldn’t bear the thought of wearing yet another neck torturing turtleneck. So I grabbed this scarf. I put it on in my usual fashion, divide length in half and put the halfway mark at my neck front and put the ends to my back. Crisscross the lengths and bring back to the front. Yes, it’s a good look but I was sooo… tired of that look.

This fabric is so pretty and soft and light and airy. It is all thanks to my friend Patty P. who bought this fabric in Paris a year ago. It is so well printed that it is hard to tell the front from the back. She cut a length of the fabric 63″ x 21″ and used the tiniest of serging on all four edges and then She gave to ME! Thank you Patty! I love it of course.

Back to the first way I wrapped this scarf. Instead of it being done as you see it above, wrap each long piece across the front of the neck and tuck the edge under it all at the back.

Taa Daa! Who knew it could be sew simple! Simple to sew, simple to create this look, and to wear! For me, it is so new and fresh. Now, YOU try it! This look is good for all neck types (long, thin, thick, short), as long as the scarf fabric is really light weight to begin with.

I saw a poppy in that fabric and here is one outside. I spied it in town when walking the other day. What a yummy, yummy color! And notice a bud in the lower left corner, soon to pop out.

Eschscholzia californica is the botanical name for California poppy. It is our state flower and native to California. Sometimes we get a double show of these beauties each year, once in the spring and again in the fall. I love the lacey type leaves (lower left corner of this picture). The long green spikey leaves on the right side of the picture are Iris leaves.

Have a Happy Spring weekend everyone! Thanks for stopping by. It’s Sparky Top weather!

Remember this Sparky Top? The center back is made from a Maxi dress made of silk chiffon. Oh my gosh, where did I put the scraps? I can even piece smaller scraps together and make a long scarf and tie it just like the scarf Patty gave me. I’ll work on that and show you ASAP.

I finished this design in the middle of winter (hence the snow). See it and all my other “Art to Wear” sewing patterns at my Etsy Shop. Whoops, if you click on the “red letters” that say Etsy shop, it takes you to my Newsletter/Blog front page.Sew while you are there, Look at the “Categories” Box and click on Sparky Top. Past posts will pop up, a whole bunch of them. Enjoy reading and learning more about Sparky Top. Some times the Etsy link will not work no matter what I do. So just go to Etsy.com/DesignsbyHeidiEmmett on your own to see all my Art to wear sewing patterns.

Thanks so much. Blessings and Hugs to you all, Heidi

I Got a New Job! 3 Days Worth!

by HEIDI WEISS EMMETT

It’s called “Quilt Rush” here in Northern California. People travel from shop to shop in about a 150 mile radius. They carry a “passport” and get it stamped at each shop they visit. A chance to be with friends (in the car) and travel to see and touch and buy all things fabric and/or quilt related. I was the “Brand Ambassador” at “Villa Rosa Designs” (only 1.25 miles from my home which in my case, can be very dangerous, haha). What a GREAT time I had!

Just as you walk into the shop you enter the “Pattern Card” room. In case you didn’t know, Pat Fryer (owner of Villa Rosa) started the pattern card phenomenon(postcard size with all instructions on the back of the card and a picture of the finished quilt on the front).

Also, look in the lower left corner. Those rolls of fabric are the “Fat Quarter Bundles.” They are ALL curated (meaning all from one designer/current line of fabrics).

These are all from the Tula Pink line of stripes (entire line, 12 ft. qtrs. in the group). Ohhh, I need this group. I found oh, so many, groups I wanted to purchase. But I was strong (remember, I only live 1.25 miles away AND I saw the BACK STOCK upstairs where no customers can go. Two rooms have the biggest long arm quilting machines I’ve ever seen. And then the studio where Pat does FB live every Friday for one hour. Sew you can do on line ordering as well.

I picked a random card to show you. Besides Pat, there are three lovely ladies that work there that design patterns also. They are Bonnie, Molly, and Heidi (yep, two Heidi’s at the same shop, very rare!!!).

All the latest quilting cottons from the best designers are packed into this shop!

The quilts from the cards are hanging EVERYWHERE! There isn’t enough space to hang on the walls so they have to be crunched up a little, but no one minds.

A newer card pattern for this wall hanging (and WOW, it is almost flat on the wall) and all the fabrics for the quilt you see are available. And then there are the kits!

Most of the kits include every fabric needed except the backing/batting. Yes, even the binding fabric. Sew, that quilt in the picture above is available as a kit as shown, for now! A week from now, who knows?

Quilts hanging EVERYWHERE.

One more to show you. I love this because it is so modern. Annnnd……I see it as a possibility for one of my “Art to Wear” sewing patterns.

Here is Acrobatic in “kit” form. SEW YUMMY!!!! All Marcia Derse Fabrics called “Spotted Graffitti.” These are 16″ blocks finished. Yes, yes, I now own this kit! I used to think for some reason that kits were “cheating.” NOT ANYMORE!! With so many, fabrics out there, one can get overloaded brain wise. Kits help you focus and learn what works for you whether it is for a quilt or garment. Speaking of garments…..

I LOVE, Charley Harper Fabrics. There are at least 60 different Charley Harper fabrics on the shelves. Here we have a bunny (we have a view of his little backside) sitting on a tortoise.

And I forgot to mention the oversized waaaaaay cool Charley Harper panels. Villa Rosa has 3 of them. I can’t decide which of those I want. Charley Harper, a fantastic artist in the late 1920’s. Started in posters and paintings.

Yes, I have decided to use the Bunny on the Tortoise in a Sparky Top. I’ll keep you posted. 3 days of Total, creativeness, fabric,and lovely people (I met oh so many, 100’s ), OVERLOAD! I sew enjoyed every minute of those 3 days I worked (It wasn’t work to me). Thanks for stopping by. Hey, see if there is some kind of quilt shop hopping in your area where you live. Even one or two (there were 10 shops in this particular shop hop), will really open your eyes to what YOU might want to create. Blessings and Hugs, Heidi

This Terrific Tabard is Just, Terrific!

by HEIDI WEISS EMMETT

A HUGE THANK YOU to Phyllis Holmes from Gardnerville, Nevada.

Phyllis sent me some pictures and I want to show them all. She made the “Tree of Life” version of Terrific Tabard.

When I created the Terrific Tabard sewing pattern, I really enjoyed creating this version of it with the collage background. I was able to use all my favorite fabric scraps.

I suggest using a black fabric for the Tree of Life itself, and the scrolls on the front, as well as the outside trim. Black is a great unifier with all the other different collage pieces that are used. Do you see “IT” on the branch of a the tree? Let’s take a closer look.

It’s a Toucan embroidered patch! It looks ” just terrific” sitting on that branch. Phyllis bought it at Fabric Chicks Creative Oasis Be sure to visit Fabric Chicks every Monday and Wednesday at 4:00p.m. (pacific time). Beth Watts, owner, and fun loving “hawker” during the show and sales, often sells several of my different “Art to Wear” sewing patterns during those times.

Phyllis, you are a beautiful seamstress. Details really MATTER to you and that makes for a beautifully finished garment.

A classic Chinese knot closure in the front. And little ties on the sides.

I LOVE her initials at the bottom front piece. Swarovski crystal initials are always her signature to any piece. Phyllis is one of several “Brand Ambassadors” that are at Fabric Chicks during the on line “show and shop” times on Mondays and Wednesdays.

Check out all of my “Art to Wear” sewing patterns at my Etsy Shop. Go to Etsy.com and in the search bar, type in DesignsbyHeidiEmmett.

Spring is HERE! It’s Camellia time.

It never ceases to amaze me how well these flowers do in typical Spring weather of cold (30 degrees yesterday), rain, snow, and everything in between.

Another Camellia bush (over 15 ft. tall). I love the little bit of backlight.

Lovely dark green shiny leaves. It is a perennial.

You have to read about our spring weather from Easter Sunday to yesterday afternoon, that’s only 5 days. First up we have Sunday,March 31st, Easter Sunday, on and off rain and hail and chilly (high 30’s to mid 40’s). And then about 6:30p.m. a beautiful rainbow appeared.

Monday, April 1st (was it an April Fool’s Day joke perhaps?), my husband and I sat outside in mid-afternoon (mid 60’s) to enjoy a cuppa and homemade cookies. Yum, yum! Beautiful blue skies with a few puffy clouds. And what should come fluttering into the yard but a Monarch butterfly. W-h-a-t?!? We usually see them in June. It was such a lovely surprise to see one on April 1st.

Gorgeous weather (mid 60’s every day) until Thursday at noon. A storm dove straight down from Alaska and the temperature dropped like a rock and there was no rain to start with. It was snow! And then, we were enjoying a bowl of homemade chicken soup and watching our new British favorite, “Murder in Paradise”, when I felt it, an EARTHQUAKE! Robert turned off the sound, and we could really feel a gentle rumbling, then a sharp, loud, crack, and then more rumbling that faded away. 15 seconds total, max. It was probably less, but time sort of stands still during an earthquake. Immediately Robert got on the cell phone. It was centered about 100 miles away and was 4.8 on the Richter scale. Another one hit in the same area a short while after that but we didn’t feel that one 4.5 We have earthquakes up and down California on a regular basis. But ours in the northern foothills of CA are NOTHING compared to the Los Angeles or San Francisco areas.

When we went to bed later that night, there was 3″ of snow on the ground. Got up at 6:00a.m. and surprise 6″ of snow! Welcome to Spring in northern California! Ha,ha, well not the earthquake. That was just a wild addition. And, the next 9 days, sunny, cloudless skies, with temps. in the high 60’s to low 70’s. These wild weather changes are why I cannot plant my vegetable garden until AFTER Mother’s Day.

Back deck at 7:30a.m. on April 5th.

Out the front bay window. 7:31a.m. April 5th. The white rose arbor is basically in the middle of the picture.

Thanks so much for stopping by. I sew appreciate each of you! Sew up some sun (not a storm) this weekend. I will leave you today with a Haiku. Hugs, Heidi

Breath of Fresh Air

Outdoor coffee break,
petals dance within the breeze,
a kiss from heaven.

– Grace Y. Estevez – Reddy GraceOfTheSun.wordpress.com (her Blog) I love her poetry.

Anytime is a Good Time to Get COZY!

by HEIDI WEISS EMMETT

Thank you for stopping by my Newsletter/Blog. I will get right to it this week. This has been a great year for my newest sewing pattern, “COZY.” Thank you one and all who have purchased COZY either as a “hard copy” or as a PDF/Digital version. Below is the garment I own that gave the impetus for this pattern.

Here is the beginning of the COZY. I still wear this sweater. I wrap it around me as I sit in a chair or on the couch. I can pull the collar up or down. Yes, it is a knitted sweater. But because it’s so loose, I knew it would work well in a stable fabric.

And here is my finished COZY, all ready for many, many, body shapes, and sizes.

I had 24 women, ALL DIFFERENT heights, weights, and shapes try on this very COZY. I did this BEFORE I created the FINAL pattern details. I include many of their comments and ideas and my own ideas for sizing with suggestions on the first page of the instructions. You will be drafting your own 4 rectangle pieces for this pattern. It’s easy, peasy, and takes about 35 minutes. This is a great pattern for beginners to experts. It fun to make for every sewing level. I also featured my pattern to be made of Kantha Cloth. Find great pieces of Kantha Cloth on Walmart.com You will need a piece at least 50″ x 70″ for one COZY. Kantha cloth is purchased in a throw size 50″ x 70″, and on up including twin, queen, and king sized.

Want to get cozy wearing your own COZY? You can purchase this pattern directly from me. Email me at, hmemmett@gmail.com in either a hard copy $15.00 + $1.00 shipping anywhere in the world, or purchase it as a PDF/Digital file for $10.00. I use Paypal or you can send me a check. You can also go to my Etsy shop: DesignsbyHeidiEmmett and see all my other art to wear patterns and purchase it from Etsy. (Etsy does charge waay more in shipping charges). 

International orders, please, please, contact me FIRST at: hmemmett@gmail.com before ever purchasing from Etsy.

Have a Happy Easter. Joy comes in the Morning, Resurrection Sunday morning. Hugs and Blessings, Heidi

Recap of my Spirals Class With Pictures.

by HEIDI WEISS EMMETT

The Spiral class that I taught several weeks ago (via zoom) was a success! Many happy students. I had so MANY samples that I didn’t have time to show and a few that I wanted to show again. Beth (owner of Fabric Chicks and Zoom class coordinator) loved my “Spiralicious” spirals so much that she asked for a pattern of some kind. I’m on it! It will be a wallhanging of some type. And I have an idea for these same spirals to add to a garment.

These first two pictures are “Super Sweet Spirals”

This one uses a fussy cut fabric for the center.

Denim upcycled little bags or even “vases”.

A “Deep Space Spiral.” This will become a pillow cover at some point. Rice stitching in between the spokes adds interest and movement.

This explosion of spirals started with the “planet panel.” This was sew much FUN to create.

I did all the background free motion machine stitching FIRST and then added the all the spiral pieces.

Whoosh! A ball of intergalactic “stuff” flying toward the planet below. More Rice stitches show movement.

A free form circle with lots going on in it, all held together by machine stitching a spiral on top.

A Spiralicious spiral close up.

Another spiralicious spiral.

I’m having fun deciding how to create a unique wallhanging using Spiralicious spirals. Stay tuned!

Layered, “Free-Form circles” with added spirals of machine stitching on a pillow top.

More Free-form circles layered.

Free-form circles, layered, with free-formed leaves, on a pillow top.

One of my nephews gave me this mug (in front of my family, and I might add, 20 in attendance at this event). Everyone thought it fit me PERFECTLY! Ha,ha.

Left front of a jacket.

In honor of spirals, circles, etc., I present my Zephyr Jacket using an old quilt that was really well loved in its’ day. I rescued what I could and created a Zephyr Jacket. A portion of the jacket back. And the picture above is 1/2 of the jacket front.

Please visit my Etsy shop: Etsy.com/DesignsbyHeidiEmmett for more information or email me at: hmemmett@gmail.com if you have any questions.

It’s going to be a perfect spring weekend to stitch by machine or by hand. It’s going to be very stormy. Thanks for stopping by. Hugs and Blessings, Heidi

A Little Poem. And some Creative Stitching Ideas!

by Heidi Weiss Emmett

Sew In Love.

When feeling low, it’s time to sew! Sew much fabric, sew little time. To sew or not to sew? What a silly question. Sewing mends the soul. When life gives you scraps, let’s sew! Create anything from a garment, to a quilt, and anything in-between. I added the last line, because sewing is NOT only quilts but sooo much more.

I’ve looked and looked for more of this fabric. At least I have found the writer of this poem. Go Here. Look closely at the first picture with the poem. It looks to me that there is more to this poem but I only bought 1/2 yard many moons ago, and that’s that. I really like this poem and my added line, because when it comes to creativity, I include ANYTHING FIBER! Hmm….That’s why I am the curator of my own Fabric Museum, I collect it all. Don’t believe me? Ask my patient, oh so patient husband!

O.K., I bought a wallhanging kit from Beth’s, Fabric Chicks Creative Oasis, while watching one of the Wednesday afternoon show and sales (go here to check it out). The kit came with the sunflower panel and lots of little pieces of silk, sparkly stuff, yarns, etc. The whole idea is to make the panel dimensional by adding things to the panel. I decided to take the class as well. I’m so glad I did.

Oh my goodness. I got back to my thread painting roots, but this time with added dimension!

Thread painting is so fun in and of itself, but adding extra layers and changing thread colors, WHAT FUN!! These petals are made from recycled silk saris from India. They start really skinny in width, but literally “open up” as they are stitched down where you want them.

I really tried to get some of the “petals” to stand up to look realistic. I am working on my “regular” sewing machine. Notice the sewing foot I am using. It is called a darning foot and does not actually sit on the surface. It hovers a bit above the throat plate and I lower the feed dogs. Now I am in complete control with my stitching. I can sew in any direction I want. I use my fingers, one hand on each side of the darning foot to have the most control.

A light touch on the gold with white trim (I cut it up as needed). My sewing machine was really smokin’ at this point. I lost all track of time as I stitched and listened to music. SEWWWW THERAPUTIC!!!

On to the sunflower center. What a luscious grouping of yarn pieces. Hmm… take note of the foot in the upper right corner. I have actually gone to a completely different machine. I’m using my “felting” machine. Felting can be done with 1 felting needle (by hand), 3 needles (still done by hand), 5 needles (done by machine), and 10-12 needles (done by machine). I am using a 5 needle felting machine.

To secure this swirled grouping of yarns in place to be felted, I use genuine cheap, stiff, netting.

I use one layer of netting and place it over the yarn. I hold it with my fingers and position those five needles and begin stitching.

Taa daa! Here is the finished center. And that piece of netting. It just pulls away, nothing sticks (that alone is very nifty!).

A different center. Whoops, I see some green showing, and the yarn slipped out of its’ spiral. Not a problem. Just add or snip off more yarn.

And one more center. Whoops, I see threads that need snipping off (long loose pieces).

Yes, it does happen. Occasionally one or more of the needles on the felting machine break. Not a problem to change. Read ALL ABOUT MACHINE FELTING. Go to the home page of my Newsletter and look for the “Categories” box. Click on “Fun Felting” and past posts will pop up. Learn “in depth” how the whole machine felting thing works. One post after the other will be there. Enjoy.

I needed batting behind the whole piece so I could quilt it. Some people will ONLY use one solid piece. As long as you piece it correctly the piecing line will never show. Butt the edges together and do a quick whip stitching together, using single or double thread. Keep it on the loose side (this stitching), and no knots. This is a great way to use up batting for quilted clothing too. Of course, use only “like” battings for piecing.

Batting and backing has been added. And now to finish up by quilting all around, not ON, the printed panel 3-D stitching parts.

I worked from the center of the panel out. Geranium leaves and flowers were stitched first. It is just more thread painting without extra pieces added (as in the sunflowers). Change threads to match (love using variegated thread colors), Again, thread painting can be fun and relaxing as all the areas are filled in.

Turn on the music and get to stitching. Don’t worry, my sticky roller is ready and waiting to pick up all the extra fluff left on the black areas.

A quick look at some other Machine Felting work. I did all this front and back using my Mia Vest pattern. Go here to see all the “Art to Wear” sewing patterns I sell.

Spirals of yarn machine felted and slow stitching are on this piece of wool boucle’.

I really appreciate each and everyone of you who stops by to see what’s going on in my Creative Life. I learn something new with fiber all the time and I LOVE to show all of you these ways with ALL THINGS FIBER! Hugs and Blessings, Heidi

Cool Tools! and “Wearing My Joy.”

by HEIDI WEISS EMMETT

I haven’t purchased any “cool tools” for my sewing studio in a long time. Let me show you what I have found. By the way, these all arrived a few days ago. I haven’t had a chance to try any of them yet.

I’m ALWAYS looking for a great thimble. When I was 8, I smashed my thimble finger in the door of the car (don’t ask me how I managed to close the door before removing my hand, but I did). I have a permanent bump right where a thimble should fit nicely. So…I bought these. Beth sold these as well as all the other cool tools I’m showing you on an every Wednesday (4-6p.m.)show and sale! Fabric Chicks Creative Oasis I learn new things and see and buy new things every week. And it’s a fun few hours with a sometimes zany group of newfound friends. You don’t actually see anyone. But you can comment and purchase at the same time on the side of your monitor. It is a running commentary.

People who were commenting at that sale said they LOVE using these poke-a-dots. I wanted you to see how nice and thick they are AND they are reusable too. There will be a little learning curve as I’m totally not used to this type of thimble or where exactly to place it on my finger tip.

Next up the Quick Turn. There are gobs of ways to turn a tube (I think I’ve tried all the others), so why not try one more.

This kit (and others in the collection) are so CUTE made up, that I had to get one to try. The square is approximately 6″ x 6″ in size so it is perfect to stash into your purse for when you have a bit of free time to stitch. Wendy Williams is from Australia. The wool pieces included are top notch. It will be fun to make up. And yes, it came in my latest Fabric Chicks box.

Yes, I’m working here doing some embroidery but what am I using?

This item is called a lap app. It is resting on my lap and both of my hands are resting on the top surface while I stitch.

I purchased this from: “The Lap App Store.” Go to www.lapappstore.net to read more about it. You can see that it is adjustable (black knobs) and PERFECT for resting both hands at once while you work. My hands never get tired or sore when I use this product. I have been using mine since January but forgot to tell you about it. I know so many ladies who have these and all of us would not be without our Lap Apps when hand stitching anything. Fabric Chicks doesn’t carry these, yet.

What is this? Read on….

I can’t wait to try this one (this weekend as I plan to do some thread painting). It will hold two CONES of thread. Cones being the operative word here. Cones are way too big to fit on a home sewing machine. My other thread stand only holds one cone. One person commented on the Fabric Chicks site that she loves machine quilting with 2 threads together, threaded into one needle (different colors of course) to get a variegated look to her work. I’ve got to try this.

Riley is wearing his “I’m Sooooo…BORED” face. It has been raining, snowing, and hailing, off and on for days on end. We take Riley out in the inclement weather but he reaches the “I’m DONE” point fairly quickly. Haha. It’s time for the “stair run.” I throw treats off the balcony upstairs while Riley runs up and down, up and down and searches for his treat. He gets a great workout that way.

I received this variegated hand sewing Perle Cotton in my box (from Fabric Chicks) and HAD TO TRY IT OUT RIGHT AWAY! Some slow stitching was in order. These two are from the Alison Glass collection that are made by Wonderfil (via Fabric Chicks cause I get free shipping with Online orders over $85.)

Yep, there are stains on this piece. I tried and tried to get them out. Enter, Wonderfil perle cotton to cover them up. Keep looking…..

This shows the two colorways I have. (sigh…there are 22 MORE variegated colors to choose from in cute sets of 12 each). I’m stitching with the one at the top of the picture. I wanted you to see that they each have a shorter length of color changes and they are more dramatic than some threads. And so smooth and easy to work with. I’m sold!

You saw the stains in the pictures above. Can you see them Now?! And please note that I did a close up this time for this picture too. O.K., it faintly, very faintly shows in this close up. I think stitching 5 or more rows over the stain in the OPPOSITE direction would really hide the stains.

Quick, a time out. I’m going to make a Mia vest out of the fabric above (the giant buffalo plaid)that I’m stitching on. Go to my Etsy shop to see all my Art to Wear” patterns that are available to purchase in pdf/digital or hard copy.

O.K., my mannequin is “Wearing my Joy” today. I showed this skirt last Saturday in my “Spirals and Uptown, Upcycled purse” zoom class. I will show more great samples from that class in the following weeks. I did not create this skirt. I saw it two weeks before my class. I added up the time to cut out and attach these Free Form Circles with Spiral stitching (they are on the back as well) and said, “No, I’ll buy this one.” I’m so glad I did.

I think this skirt is so fun and it is truly one of a kind! A BIG thankyou to Beth for having me teach to such a great group of ladies from so many places, even as far away as Australia! Thank you Miss Moira (you’re the BEST for getting up at 4:00a.m. to take part)! I hope to teach it again in the coming months and I have already started on a quilted wall hanging pattern that will be incorporated in the class. I hope to see some of you, my loyal followers to this newsletter in the class too. It will be a SPIRALICIOUS GOOD TIME!

Oh my goodness. For ONCE the link actually took me to my own Etsy shop. Remember, I could not get the link to work for months. So I have to do this one more time. Please visit my Etsy shop to see all the patterns I sell. I can answer any questions you might have BEFORE you purchase (especially International orders) by going to my email: hmemmett@gmail.com

Hugs and Blessings to you all for stopping by today! Heidi

A Perfect Time to Slow Stitch!

by Heidi Weiss Emmett

Here in northern California in the Sierra Foothills, we are preparing for a major snowstorm this weekend. They are talking up to 12 FEET of snow in the higher elevations. We are at 3,000ft. (on the lower side). We’ll see how it all pans out. In the meantime, it’s good to be prepared. So, this weekend I will focus on “Slow Stitching” just in case the electricity goes out. We do have a generator but have to be really careful about what we turn on when it is in use. No sewing machines or irons as they use a lot of juice. I’ve put together some pictures of a few slow stitching ideas. Enjoy.

I first saw this pillow upside down. What design is this I thought? Hello, it’s a world map done in slow stitching!!! Oh, the big gold “X” is where it was made. It was done for Ikea and made in India.

I really like the way each continent was outlined first with slow stitches and then filled in. Great idea for any design you should choose.

O.K., I just had FUN doing whatever I wanted on this orange piece. It includes, slow stitching, machine felted yarn circles, machine quilting, and a funky, plaid “deep space spiral.”

I used a variegated, knit cro-sheen (similar to pearl cotton but MUCH cheaper) for the slow stitching. This was so fun to create. I think I will eventually make a pillow out of it.

Every fabric in this piece is from men’s shirts. Yep, I used the whole cuff, including the buttons.

Again, so relaxing and fun to create.

This made into a great tote bag for my tablet, except for the loop (from a jean pant leg seam)on the side. It keeps getting caught on handles, door knobs, etc. I think I’ll cut it and tie it into a shorter knot and cut off the excess. I really enjoy upcycling. Make it up as you go!

Does it count as slow stitching when using silk ribbon? Hmm… you decide.

Hand woven scarf using silk yarn. The pretty colored bits are pieces of silk ribbon.

Isn’t this so clever? Soft silk scarf with great hand dyed pieces of silk ribbon stitched into the scarf. Yes, I think this is a “type” of slow stitching. And yes, I bought this brand new scarf at the Thrift Shop. I think this is such a unique and beautiful piece.

Taking it slow and easy is Mr. Rubix. He is 14 years young! He is so handsome. The white “ruff” around his whole head has really settled down over the years. He looked just like a lion when it was fluffed out.

Rubix enjoys watching dog and cat videos on Instagram with my husband! Ha,ha.

Take care and take it slow. Slow Stitching that is. Hugs and Blessings to you all. Heidi

I’m Teaching a Zoom Class!

by Heidi Weiss Emmett

On March 2nd, I’m teaching all about “Everything Spirals” and an “Uptown, Upcycled Purse” class. It will be 2 1/2 hours of non-stop fun! I will be demonstrating and showing, lots of different spirals. All these spirals work on so many types of clothing, pillows, quilts, etc. And then it’s on to upcycling your most favorite bag that you have buried in a closet because you can’t bear to part with it. Learn how to make it new and fresh again. The cost of the class is $25. I hope you can join us.

Here is the link to enroll in the class: Fabric Chicks go here! Below, please enjoy mostly close up pictures of spirals that will be shown. When I teach, I’m ALL about showing samples. There will be many!!

Of course, I have names for the different spirals I talk about. Here is a close up of “Spiralicious.”

This is “Super Sweet Spiral.”

And another super sweet spiral using a favorite teeny, tiny, fussy cut center.

Another Spiralicious piece.

“Free Form Circles” (they can be made more spirally by the stitching lines used to hold it in place).

Here is a more spirally free form circle. Oh wow, I am having some real stitching issues on this project (middle on the left side, classic issue, bobbin thread coming out of its tension slot in the bobbin case, and lower right corner, the changes in stitch length, aka pedal to the metal).Sigh…but I just kept going didn’t I. It’s because it is a CLOSE UP shot. From a distance, not noticeable, or sew I think. Haha.

You are going to love this spiral. I call it “Deep Space Spiral.”

A passion flower. I have said it before in this Blog/Newsletter, I think there is a universe in each and every flower. Look closely.

A universe is being formed right here in this closeup of a Dahlia. AND THE COLORS! Carry a photo of this to your stash and pick out an entire color combo for your next quilted garment or a quilt. You will look like a color genius. Do you see the spirals?

And here we go again! What!? I see spirals, beautiful spirals in many, many, flowers. Maybe that’s why I have so much fun creating intricate looking (but easy to stitch) spirals. It all came from my love of flowers and closeup shots of them.

Close up of the pocket cover of the “Uptown, Upcycled Purse.”

A little further away. So easy and fun to do. I will show you.

And the whole purse for “Uptown, Upcycled, Purse.” The purse is resting on top of my sheep shearling pillow, in case you were wondering.

Check out Beth’s shop: Fabric Chicks Creative Oasis and her line up of classes, and DON’T MISS another “Live” on either FB or You Tube on Wednesdays from 4:00p.m.-6:00pacific time. They are a show and sale extravaganza. Beth always shows the latest, greatest in fabrics and notions. Lot’s of laughs too.

Don’t forget to check out all my “Art to Wear” sewing patterns/accessories at my Etsy shop: Etsy.com/DesignsbyHeidiEmmett (I have tried to create a link but it ALWAYS adds other peoples items,with mine so it is very confusing. sigh…) It’s simple really: in your search bar, type Etsy.com When you get to Etsy’s home page, type in DesignsbyHeidiEmmett in their search bar. Taa Daa! you should go right to my shop!

I am so happy that you stopped by. I will trust that you were inspired to get some creative going in your own sewing world. Hugs and Blessings, Heidi

Denim Daze!

by HEIDI WEISS EMMETT

I am so honored that you have stopped by! I know there are a bazillion blogs out there and you chose to come to mine today. Thank you! Let’s get going.

You know I love to incorporate denim in my upcycling projects. An easy way to find project possibilities is on Pinterest. So be sure to follow me on Pinterest, DesignsbyHeidiEmmett and check out my board called “Denim upcycles” Be prepared to be overwhelmed. Haha. I created my version of denim upcycling, using my Mia Vest pattern. I will show those pictures 3-6th pictures. The rest of the pictures, are right from Pinterest, and I see each one as a possible project/part of a project/snippet of a project/or just enjoying the creativity of the piece.

The more bias the cut out pieces are = less fraying when washed. This is a GREAT example of that. Use lighter weight denims in a project like this (so many layers).

This is a great way to start if you have nothing planned but know you want to work with denim (or any other combo of fabrics) I do this myself just to have a little project to carry in my purse, or close by the T.V. ( just in case I have a moment to work on it).

Mia Vest, by Heidi Emmett. See this pattern at my Etsy shop: DesignsbyHeidiEmmett

Here is the back of my Mia Vest. I talk about it in more detail in a past post on my site: DesignsbyHeidi.wordpress.com Go to the home page and look for the “Categories” box. Click on Mia Vest and past posts will pop up. Learn more about this versatile sewing pattern.

Front cover of Mia Vest pattern. $15.00 US + shipping for a “hard copy” which includes tissue pattern pieces. $9.95 US for a digital pattern. International orders, contact me first at hmemmett@gmail.com for cheaper shipping options.

Etsy.com/DesignsbyHeidiEmmett to see all my “Art to Wear” sewing patterns.

What a terrific idea. The underneath circles could even be stenciled on a plain piece of fabric. Maybe these were stenciled on?

Ohhhh, the possibilities here.

Wow, I want to see what garment/tote bag/ or whatever this is. Very nice work. I haven’t seen a complete picture at this time.

So simple and sweet. One on each knee of a kiddos pair of jeans. Wait a minute, I WANT one or two myself. I am a kid at heart!

O.K. these running stitches are too perfect. “ai” perhaps? Kidding, just kidding. But, there is no way I could EVER create such neat and perfect stitches on my own. Haha.

what fun! And I’m sure you realize the flower centers are cut up jean zippers. Very creative use for all parts of a pair of jeans.

Well, well, the beauty of slow stitching, make it what you want. Check out the pincushion too.

Ohhhhhh…..YOWZAA! I aspire to this level of stitching someday! I like how the even stitching in the center rectangle ever so slightly pulls up the fabric.

I pulled this from my Blog/Newsletter archives. I took this picture 5+ years ago! I think it is a fabulous piece of art! The Anthropologie store in Roseville, CA has AMAZING displays and clothes and such as well. I have not been in awhile. A field trip is in order.

A Bunny and a Skunk out of denim scraps?!?! It can be done people!

I found a quote by Zig Ziglar.

“F-E-A-R has 2 meanings: Forget Everything, And Run.” or “Face Everything And Rise.”

Thank you again for stopping by. I can’t wait to hear about a denim upcycling project you have made or are creating. Hugs and Blessings, Heidi

It Was a Dark and Stormy Few Days!

by Heidi Weiss Emmett

Wow! I’m sure that you all have heard how storms with wind, rain, & snow ravaged the ENTIRE state of California this past week. Here in Grass Valley, 6″ of rain, INCREDIBLE winds, (102 mph posted in San Francisco Bay) our little wind gauge on our second story roof is long gone (we think at least 55mph here in G.V.). We finished the storm with a lovely 4″ of snow. CrAzzzY! times. So, we hunkered down and it was time to SEW something. I say WE because my two friends were here (KA and Linda my sewing friends!! from Portland, Oregon).

Linda and Karenanne didn’t bring ANY projects this time(they were too busy with family stuff in the Napa and Sacramento area first), so it was decided that Linda would crack the whip and make ME get something done! with my quilting projects.

Number 1. I found a really fun site, Whip-stitch.com Deborah Moebus combines stitching up clothing AND quilts along with a “Cozy Mystery” to read (that she wrote herself). I am so excited about this quilting challenge. This years mystery quilt and book is all about Greece.

I got everything ready to go (it starts in January, and then a new block every month after that and of course more of the mystery you get to read) and then life got in the way. Well now, along came Linda and she would have none of that (NOW I know why she is so important in her job and can get ALL the many, many, people she is in charge of to do what she needs to have done)!! And she is so sweet about telling you what to do. Haha!

I STILL am in shock that my 2 blocks are done, I mean COMPLETED, as shown above. Linda had also signed up for this (I told her she had to haha, works both ways) murder mystery quilt 2024, but she had not yet had a chance to get fabrics together.

Whoohoo, I pulled out all the fabrics I had thought would work (umm….yes, I have a bunch) and together we went through them all and picked out all the fabrics for the both of us. What fun. And then Linda whipped up her 2 squares. So we are both ready for next Wednesday when new clues will drop, a new block/blocks to make and more chapters to read.

That really felt so good to get something done AHEAD of time! I’m usually scrambling till the last minute on a deadline. Thank you so much dear friend Linda for helping me perceiver.

One more quilt top to make. Here is the pattern. Have you seen these quilt cards? Pat from Villa Rosa came up with the postcard sized quilt pattern idea. Everything on one little post card sized piece. This one came as a kit (the fabrics above are long gone now, BUT they had a new one hanging in the shop Villa Rosa Yes, the actual shop is only 2 miles from my home! This can be really dangerous.

Isn’t this cute? And yes, so easy as the center is a panel. And what a departure from the original On Key quilt that’s on the postcard.

A closer look at the fabric used in this kit. WHAT!??! Yep, I bought a kit. I love kits, NOW. Awhile back Linda and I both thought they were cheating. Silly us. A kit lets you almost put your brain in neutral and just sew and have fun with the process. I told Linda I would set it aside and work on it in a week or two. No WAY! “This is so easy. I’ll cut and you sew. Let’s do this.” And we did.

Well, almost. And I almost forgot, through all the sewing, Karenanne was the “ironer” extraordinaire! Thank you KA. What a DIFFERENCE a PRESSED piece of fabric makes BEFORE it is cut up! Yep, I have been known to forget that step. We really did run out of time their last night but I promised to get it done the next day. And I did !! while watching the snow fall.

Working on simple projects completely different from my Art to Wear patterns has been really good for me. YOU need to try this. And give yourself a whole day or weekend to really have fun. YOU NEED this time. All the other things you think you HAVE to get done will still be waiting for you. But now, you will be refreshed and ready to do them. I appreciate your being part of my “Blogosphere”. Hugs and Blessings to you all, Heidi

What?! Another This & That Friday.

By HEIDI WEISS EMMETT

Busy, BUSY, I have been. So I’ll be quick this week. Enjoy!

I also want to say thank you to all of you who have ordered my “Art to Wear” sewing patterns. The bulk are in the U.S.A. but I want a map so I can mark all my International orders too. In the weeks of this past January, I have sold patterns to Kirsten from the Netherlands, Katerina from Austria, Anna from Malaysia (that is a first) , and Valerie from Canada, and lovely Margaret from the U.K. It is sew much fun to have new sewing friends from around the world. It is IMPORTANT to note that if you are ordering from Etsy, ORDER PDF/DIGITAL ONLY! Email me FIRST at hmemmett@gmail.com for more information.

I Have to talk about the COZY above.It was made by Kathy from Las Cruses, New Mexico. I love the sophisticated jungle scene Kantha cloth.  Here is what Kathy said: “I have had much fun sewing multiples of your patterns.  My friends who are not sewists were given COZY’S and ZEPHYR JACKETS as Christmas gifts and are very happy.” Kathy made 7, YES, SEVEN, of these patterns. And, she sent them to Walmart.com to choose their Kantha’s. So everyone got exactly what they wanted. Great idea.

I just sent 3 more of my patterns off to Kathy. She is getting Sparky Top, Calypso, and Whisper Blouse. I can’t wait to see and hear what she does with these.

Don’t forget my friends, go to the home page of this Newsletter/Blog you are on right now DesignsbyHeidi.wordpress.com and look for the “Categories” box. Click on any pattern or “idea” I list and past posts will pop up. Learn new tips and ideas. I have been told that people have lots of fun perusing past posts.

I have this thing regarding pincushions. Whenever I attend a quilting function (where everyone is sewing), I take pictures of fun pin cushions. I hope Mr. Turtle will make it across the table divide without falling through.

Little mouse is made out of silk scraps in my favorite shade of green. Something must have scared him as his little gold whiskers are flat against his little face.

At this same sewing event, several of these ladies were using this particular rotary cutter. Go here to check it out. It is unusual in that it is an Ergonomic rotary cutter. Everyone who used one said they LOVED theirs and that they could use it for hours on end and not feel any pain. A little learning curve but WELL WORTH it. The company is called Martelli. 

Have a great weekend everyone. Thank you for stopping by. Keep on creating! Hugs and Blessings, Heidi

A This and That Friday!

by HEIDI WEISS EMMETT

All right, first up I have something different to show. Is it a bird, a flying saucer?

I found this in the thrift shop and was intrigued. Yes, there is a little loop on top and a small tassel underneath.

Here it is flat down on the table. And this is the way I found it in the thrift shop. It measures 6″ across at its widest.

And here is the underside, with the tassel instead of a loop. Maybe a potholder? There is no opening anywhere. All closed up. So what do you think?

A friend, hi Judi, sent this to her friend via FB. I saw it and I think it is so fun. I think ORIGINALLY, all the balloons were cut out of fabric and maybe the dress too. I have no idea how I would use this but I think it has such possibilities.

This is sooooooooo ME!!!! There are times I wake up in the middle of the night and come up with yet another idea to add to the overwhelm!

This is just so sweet that I had to show you all.

This is just too funny.

The front of my “Tree of Life” version of my “Art to Wear” sewing pattern, called Terrific Tabard.

The back of “Tree of Life” version of Terrific Tabard, a sewing pattern.

“View A “of Terrific Tabard, a sewing pattern by me, Heidi Emmett. Email me at hmemmett@gmail.com or see all my sewing patterns at my Etsy shop, “DesignsbyHeidiEmmett”

And the back of “Aussie Angle” from Terrific Tabard, view “A”. The majority of this vest is made out of an Aboriginal designed fabric from M & S Textiles. I’m teaching a zoom class using this pattern, tomorrow.I teach via Fabric Chicks and my Dining room. Beth at Fabric Chicks is the organizer of the class and I pop in to teach from 150 miles away. Sometimes technology is pretty cool. You must visit Fabric Chicks Creative Oasis. And DEFINETLY check out Beth’s show and sales on Wednesdays, from 4:00p.m. – 6:00p.m. (pacific time zone). Oh my goodness. You will go crazy with all the cool stuff you can purchase.

Check out the leopard chair behind the vest. Isn’t it the coolest! I have 2 of these chairs and that is ultra suede fabric on the chairs (lest you think I’m a terrible person). Ultra suede is the ultimate in upholstery fabric. It wears like iron and always looks brand new.

Sue M. posted this on her FB page. Again, this is soooooo me! How about you all? Am I the only one? Haha. I don’t think so…. Of course, my sign would say, “quilted clothing/quilts”. But you get the idea…..

I meant to show you the pattern front of Terrific Tabard. You maybe have enough fabric in your “present stash” to make a few of these vests right now. Whatever you choose to work on this weekend, “Make it up, Have fun, and GET IT DONE!” Hugs and Blessings, Heidi

Zephyr Jacket, Let’s Add Longer Sleeves!

by HEIDI WEISS EMMETT

I got a question the other day about myZephyr Jacket sewing pattern. It was, “Can the sleeves be lengthened?” Let’s take a look see on that.

Here’s the pattern. As you can see this is an “all in one sleeve” . Learn more about my “Art to Wear” Zephyr Jacket pattern at my Etsy shop: Type in Etsy.com When you get there, in the search bar, type in, DesignsbyHeidiEmmett. All of my patterns pop up. The majority of my patterns come two ways, “hard copy” or PDF/Digital. All international orders- please, PLEASE, contact me first at my email: hmemmett@gmail.com  I’ll save you $$$ in shipping charges (Etsy over charges in shipping). This applies to United States orders too.

Here is another Zephyr Jacket (made from an old quilt). You can see the sleeve really well. It isn’t even a 3/4 length. It hits right above the elbow.

One more look see at the sleeve shape. O.K., let’s lengthen this sleeve. It will be easy. You might need someone to hold the tissue piece up and measure the actual length on your arm. At the same time decide how long you want it to end up. And something to consider, Maybe a rolled up sleeve. In fact, for this sleeve lengthening, I’m adding enough length to roll up the sleeve.

You will need a piece of pattern tracing material, tape, scissors, pen, and a long clear ruler (mine is 6″ x 24″). The piece of pattern tracing material is at least 3″ on either side of the sleeve edges and at least 5″ longer than you think you’ll need. Tape that piece to the sleeve edge as the picture above shows.

Now, lay the ruler along the top edge of the sleeve tissue pattern. The point of my pen is pointing to how it should look. I had already measured that I needed to add 12″ in length for my longer sleeve, so the ruler is 12″ into the white portion and the rest of the ruler length follows the top of the sleeve tissue pattern piece.

For the bottom edge of the sleeve, eyeball the curve (under the arm) and then use the ruler to create a nice straight edge. For the new sleeve edge (that I will hem), I measured 12″ from the end of the former sleeve edge at both the top and bottom, then drew the line across the bottom.

Here is a close up image of the under arm solution. Repeat this process on the sleeve edge of the back piece of Zephyr Jacket.  One last thing, with an all in one sleeve piece, a larger width of fabric is required. If you can’t get it to fit on your fabric piece, cut off the sleeve at the old edge, straight across. Now you have a 2-piece sleeve. Cut the bottom portion of the sleeve from scraps. Add seam allowances if you feel the need, or take the smallest seam you can. You just gave your Zephyr Jacket a “cool” new look!

Sunrise from my office window this past week. Time it was taken, about 7:20 a.m.

Less than 10 minutes later and I got this shot. WOW! what a great way to start the day! Glad that you could stop by today. I’ve got lots of projects lined up (o.k. it’s only four, well five if you count my knitting) for what is supposed to be a very, VERY, rainy weekend. Take care now. Hugs and Blessings, Heidi

Take a Class this January! Terrific Tabard!

By HEIDI WEISS EMMETT

Welcome! Do you want to learn something new in your Creative Clothing world? Take my 2-part Zoom class where you will create a Terrific Tabard. First session is from 4-5p.m. on Tuesday Jan. 24th and then again on Saturday, Jan. 27th from 10-12p.m. In the first class we will work on fitting the tissue pattern pieces just for YOU, and decisions about which view (collar or no collar), as well as fabrics and possible ideas for your Terrific Tabard. The second class will discuss and show, piecing, fussy cutting (a fast and easy way) and several quilting techniques, (batting or no batting), etc. It’s all about HAVING FUN and ENJOYING the process. You get to keep the class as it is recorded. And I am available long after the class ends if you ever have other questions. My email is hmemmett@gmail.com

Here is the pattern front of Terrific Tabard with the two views: on the left no collar, on the right is Aussie Angle with a small front collar. This class via zoom is offered through Fabric Chicks Creative Oasis (click on any portion of the “red wording”) Beth Watts is the owner. Or call at
(775) 267-0204 to get more information. You might have to call more than once. Her shop is in Gardnerville, Nevada (time zone is Pacific ). The cost of the class includes the pattern and forever access to the class. Come, join in the fun.

Another Terrific Tabard made from a piece of Kantha Cloth. I added the Kaffe Fassett shapes. This vest is reversible. So Kantha Cloth is a great possibility for this vest pattern.

I made this Terrific Tabard for Beth Watts using mostly Aboriginal pieces.

Hand/machine felted piece from a felting artist in Krakow, Poland is the focal point for this Terrific Tabard vest front.

Same vest pattern and view. Left, aboriginal fabrics pieced and quilted. Right, sooo much taller than I am (Sandra added a bunch of extra inches in the length) and created her vest all in one fabulous fabric. GREAT idea.

Margaret made her Terrific Tabard in her own figure slimming pieced design and this one has no collar.

This Terrific Tabard has no batting, and no quilting. Wear this very nicely from Spring–Fall.

I had to showcase this hand printed canvas with knotted colorful threads. There is no batting and no quilting with this vest.

Consider taking this fun class! But don’t wait to long. Learn new tips and ideas that aren’t in the pattern. I hope to see you in class. Call/Contact, Fabric Chicks Creative Oasis, via FB or YouTube or call 775-267-0204 and sign up for the 2-part zoom Terrific Tabard class. 1st class is Tuesday, Jan. 23rd, 4-5 p.m. (west coast time), and Saturday, Jan. 27th, 10-12p.m.

Love you all for stopping by. Hugs and blessings, Heidi

Happy New Year! Let’s get COZY!

by Heidi Weiss Emmett

Thank you for stopping by my Newsletter/Blog. I will get right to it this week. This has been a great year for my newest sewing pattern, “COZY.” Thank you one and all who have purchased COZY either as a “hard copy” or as a PDF/Digital version. Below is the garment I own that gave the impetus for this pattern.

Here is the beginning of the COZY. I still wear this sweater. I wrap it around me as I sit in a chair or on the couch. I can pull the collar up or down. Yes, it is a knitted sweater. But because it’s so loose, I knew it would work well in a stable fabric.

And here is my finished COZY, all ready for many, many, body shapes, and sizes.

I had 24 women, ALL DIFFERENT heights, weights, and shapes try on this very COZY. I did this BEFORE I created the FINAL pattern details. I include many of their comments and ideas and my own ideas for sizing with suggestions on the first page of the instructions. You will be drafting your own 4 rectangle pieces for this pattern. It’s easy, peasy, and takes about 35 minutes. This is a great pattern for beginners to experts. It fun to make for every sewing level. I also featured my pattern to be made of Kantha Cloth. Find great pieces of Kantha Cloth on Walmart.com You will need a piece at least 50″ x 70″ for one COZY. Kantha cloth is purchased in a throw size 50″ x 70″, and on up including twin, queen, and king sized.

Want to get cozy wearing your own COZY? You can purchase this pattern directly from me. Email me at, hmemmett@gmail.com in either a hard copy $15.00 + $1.00 shipping anywhere in the world, or purchase it as a PDF/Digital file for $10.00. I use Paypal or you can send me a check. You can also go to my Etsy shop: DesignsbyHeidiEmmett and see all my other art to wear patterns and purchase it from Etsy. (Etsy does charge waay more in shipping charges). 

International orders, please, please, contact me FIRST at: hmemmett@gmail.com before ever purchasing from Etsy.

Have a great sewing weekend everyone. Hugs and Blessings, Heidi

Roar Into the New Year with Attitude! Make an Off The Grid Vest!

by Heidi Weiss Emmett

Attitude and Dressing for Success! Let’s do it for the New Year. And an Off The Grid Vest is a good way to start.

I made this one using Marcia Derse fabrics and some modern quilt blocks that I put together.

Here is the pattern you need! If you have ever made a quilt or sewn a few garments, this pattern is perfect for you. OFF THE GRID VEST incorporates simple quilting techniques as well as some simple sewing techniques. And if you have ANY questions, I am just an email away: hmemmett@gmail.com

For this OFF THE GRID VEST I used a pre-machine felted fabric. I love it AND it is reversible.

I spread this Off The Grid Vest out a bit on my mannequin to take this picture. This one is by a student. I really like the black background (makes all the blocks and “sticks” really pop. You can barely see it but with all the quilting lines, a sparkly silver thread was used. That thread is the perfect finishing touch.

Here is another OFF THE GRID VEST using one, all color fabric for the background pieces. In this case, I’m thinking this is “Grunge” fabric in black. Grunge is by Moda A single button and tab holds each side together. This what really sets this pattern apart-NO SIDE SEAMS. Lot’s more room to move about and be comfortable.

A shot of OFF THE GRID VEST using the same gradated “grey” fabric that I used in my cover vest for the pattern. Compare it to the black fabrics used in other OTGV’s and you see a completely different feel to this vest. Notice the open sides.

Check out this OFF THE GRID VEST! Again using the Moda, gradated fabric like the cover shot of the pattern. This picture also shows the uniqueness of this pattern using rectangle pieces. I give you the measurements in the instructions and you draft up your own pattern pieces. Easy, peasy!

And how about this OFF THE GRID VEST. She used a completely different background fabric and why not! Everyone needs to show their own creativity and style.

A very different OFF THE GRID VEST. She chose to eliminate the collar altogether. Again, why not! Make it your own style. And look, all the rectangles were first pieced and then cut out.

And here we have one last and Very STUNNING example of OFF THE GRID VEST.A black background with the fuchsia colored thread for quilting is the PERFECT background for what I will call “Sticks and Stones.” Kudos to all of you in this post who made me so proud of how each of you really, REALLY, got creative with YOUR versions of my Art to Wear sewing pattern, OFF THE GRID VEST.

One last picture of my OFF THE GRID VEST PATTERN. Buy it two ways: PDF/Digital (PERFECT for international orders), or “hard copy” (everything the PDF/Digital version has but I print it up for you and send it snail mail). Order DIRECTLY from me: hmemmett@gmail.com or visit my Etsy shop: Etsy.com and in the search bar type in: DesignsbyHeidiEmmett $9.95 US for Digital files, and $15 US plus shipping as a hard copy.

Thank you all for following my Blog/Newsletter. I really appreciate each and every one of you so much. Also, if you want to see more posts about all the above vests, go to the home page of this blog/newsletter and look for the “Categories” box. Click on OFF THE GRID VEST and past posts will pop up (lots and lots of them!!). Learn new tips and ideas. ABOVE ALL, HAVE FUN!

Have a very Merry Christmas and I will visit with you again in the New Year! Hugs and Blessings, and Jesus is the reason for the season! Heidi

Holiday Fun with Sparky Top! Let’s Do Some Upcycling!

by Heidi Weiss Emmett

This all started with the necklace and my Sparky Top sewing pattern. The Sparky Top pattern can be seen at the end of this short newsletter. The necklace (or something similar) can be found by going to Etsy and typing in “Steampunk” necklaces. Mine came from a sweet shop out of London, England.

I did not just whip this version of Sparky Top up. I have to “hunt” and “gather” for everything first. AND I’m not always certain of what I’ll make out of my “gathers.” I had a tub going of black and gray clothing for upcycling. This collection took a little over a year to gather. When I am feeling extra creative, I take a few hours, coffee in hand, and pull each piece out of the tub and place it on my cutting table. Then I put a few patterns near by and pull each one up and think about all the fabrics that are available. I like similar weights of fabrics as they will work together better. Hmm…nothing speaks to me yet. Then I grab a necklace or two, that always helps, and add those to the mix. If I still can’t decide, I leave it all out for awhile and do something else and come back to it.

I have to admit, I showed this Sparky Top last Fall too (the leaves are the giveaway). I think it’s timeless and fun and deserves to be shown again. The turtleneck is separate from Sparky Top. I want to tell you what each piece of this top came from. The lower sleeves came from a long sleeved stretch velvet top. I just cut the sleeves off and attached them to the short sleeve. Bam! That was easy. Next…

The center lower back is from a skirt, a long skirt (hit the top of the ankle). The very cool button detailing was a side detailing from the skirt. Since it was a longer skirt, I decided I did not want to cut off any of the details so I made this Sparky Top much longer. I really like how it adds drama to the whole look. The upper back area was once upon a time a cashmere cardigan. I love the soft feel of the cashmere on my shoulders and it keeps them warm.

There were a couple of holes in the sweater so to cover them up and add some more texture and details I found my BLACK trim shoe box. I added beads and buttons. I made the ribbon rose on my shoulder, but found the large rosette from a small piece of fabric that was filled with these roses. The faceted black jet button is reflecting the leaves on the ground. Crazy, right?!

This Sparky Top front is from the craziest dress I’d ever seen (thrift shop of course). I really liked the different stripes in one garment. All that is left to create are the two side panels. They are a combo of the striped fabric (going a different direction) AND some plaid skirt scraps. Great idea: piece your pieces! Each piece does NOT have to be just one fabric. Enjoy the process.

I just love this back. Oh and I purposely made the sleeves longer so they would act like fingerless gloves and showcase any rings I might wear.

A nice close up of the center back detailing of Sparky Top, an “Art to Wear” sewing pattern by DesignsbyHeidi.wordpress.com

Or, go to my Etsy shop: Etsy.com and then, in the search bar, type, DesignsbyHeidiEmmett

I’m so glad you stopped on by! Tell your friends about my Newsletter/Blog. Upcycling is so much fun and so rewarding. The hardest part is where do you put all the treasures you have collected for your upcycling projects. Sigh…. Hugs, and Blessings, Heidi 

P.S. You can always email me at: hmemmett@gmail.com if you have questions.

Wait Until You See These!

by HEIDI WEISS EMMETT

I’m showcasing two ladies this week and their fun creations. Enjoy!

First up is Judy from Texas. She made her first COZY.

Here is my COZY pattern. Visit my Etsy shop: Etsy.com/DesignsbyHeidiEmmett to see all of my “Art to Wear” sewing patterns. I really enjoy how each person takes one of my patterns and makes it their own. What fun! Let’s check them out!

What you are reading below is some of the back and forth Judy and I had while she was creating this really fun COZY.

Hi Judy,
I LOVE your COZY! It looks FABULOUS on you! I love the rolled jeans and leather boots. You are so darling in this photo (and your little puppsky looks cute too). I am so sorry that working with the Kantha cloth was not fun for you. BUT, you must try again, now that you have what looks to me, a masterfully fitting COZY! I re-read all the messages we had going back and forth. Yowzaa, how could I MISS that you were pulling out all the slow stitching (the rows and rows of kind of “wonky” running stitches (probably white for 4-5 rows and then alternating to black)). Young ladies in India do all that work by hand. It’s how the two fabrics are “held” together. Those of us who use Kantha cloth, consider it part of the charm and it gives a little more of a weighted feeling (like a real quilt might), to the piece. They don’t ever tie knots, but just start wherever with a new length of thread. Slow stitching, Sashiko (Japanese stitching which is perfect by the way and super tiny, and you PAY for it, I only own a couple of scarves), are just two of the names for long, running stitches. I really hope you will make another one. May I please show off your picture in a future Blog post (I finally figured how to transfer it from here, me and technology sometimes, sigh) Let me know about the picture and I would only use Judy G. from Texas. Take care my sewing friend. Hugs, Heidi

And here is Judy’s response to my email.

I wondered why you seemed so cool with me taking that out because I knew someone hand did it. Yes, white then black but very pulled and snipped. Again, kept the scarf and pockets. I’m sorry sweet ladies in India. My little Dotty’s nails were only going to pull it worse. A bit of OCD was not handling the pulled threads. So yeah, that wasn’t funny either. Did you see where I sewed RST to fill in the botched neck?!! Then cut again?! I was not giving up. I think I’d like a light denim one.
Yes, by all means Judy from Texas.
Thanks again!!

For the next few pictures, my sewing friend Gail used Off The Grid Vest pattern as shown her. Gail did shorten her vest a bit and she did not button the sides. Remember, Off The Grid Vest does not have side seams ON PURPOSE. They are closed by a single button and tab on either side. With open sides one has a much better fit, keeping it looking “long and lean” on the body. Below is Gail and my exchanges. Enjoy her colorful, beautifully created vest.

I finally got my vest completed. My guild’s presidents challenge is due tonight. I spent the last month working on it. 

I’m sure I made it more complicated than necessary but as I had ideas, they got added to the vest. I also made it reversible.

This is from Gail S. who lives in SOUTHEASTERN MichIgan.

Of course you can post my pictures on your blog. I’d be honored. 

I had so much fun working on this. I love how it came out. I borrowed a lot of others vest creations on Pinterest. I’m much more logical/analytical than creative. I’d work on a piece and then have to walk away to think some more. I’d think I was done with a section and nope, had to add more. 

I did not win the challenge. To far out of the box for a bunch of old ladies in my guild. lol 

I NEED to break in here and say, WHAT!!?? more logical/analytical than creative! THAT IS SO NOT TRUE! my sewing friend, Gail. This is such a STUNNING, COLORFUL, BEAUTIFULLY CREATED vest. This is a true, “Art to Wear” piece and should be treated as such. Those “old ladies” just don’t understand what TRUE ART TO WEAR really is. Their loss. You know that you will receive tons of compliments every time you wear this (wear black top, pants, and shoes/boots, to showcase this amazing piece).

REVERSIBLE too! You gotta love that.

The back of Gail from South Eastern Michigan’s version of DesignsbyHeidiEmmett’s pattern, Off The Grid Vest.

The fur bits and threads add extra texture, haha.

What FUN! The back of Gail’s reversible Off The Grid Vest.

We just had a Mini-fashion show today! Thank you again to Judy and Gail for allowing me to show their great creations. Keep the creativity going ladies and ALL of you my sewing friends. 15 minutes a day, WE CAN DO THIS!

Hugs, and Blessings, Heidi

Holiday Festivities NEED a Proper COZY to Wear!

by HEIDI WEISS EMMETT

Celebrate in style with a glamorous new COZY! Make one in a gorgeous black embroidered Kantha cloth, or how about a beautiful, black, stretch velvet.

Start with a COZY pattern: from my Etsy shop, DesignsbyHeidiEmmett Purchase it in pdf/digital format for $10. or a hard copy for $15. plus shipping. If you are ordering internationally, PLEASE contact me FIRST at my email: hmemmett@gmail.com

Check out this exquisite black stretch velvet made into a COZY. This fabric came from Fabric Wholesale Direct (click anywhere on the red lettered words). The fabric drapes beautifully, easy care, and easy to sew with. A really nice company to work with as well.

My friend Patty P. made this Velvet COZY and lent it to me to photograph. Here are the changes she made on the original COZY pattern to give it a sleeker look. Please note that her changes work because this fabric is a STRETCH velvet. Front neckline is only cut 3 1/2″ down (4 1/4″ in original pattern).Patty wanted to showcase a necklace, hence the higher neckline. The sleeves are cut 6″ longer than the original, and trimmed under the arms to make a slimmer line. Under sleeve arms are only a 7″ depth compared to the original of 13″. Narrowing the the sleeves means the sides are narrowed also. Original front piece is 32″ from side to side at the bottom. Patty made it 25″ across the bottom. Also, there are 7″ slits on either side. There are no pockets. The collar piece is still the same as the original BUT, it is doubled so you never see the wrong side. I think that the collar being doubled gives the illusion of a “frame” around the necklace. Be sure to use a stretch stitch on your machine to sew this stretch velvet. If not, you will surely “pop” some seams (especially at the neckline).

I think you can really see what I am saying about the doubled collar being the frame for a beautiful necklace. The necklace I used above is too short in my opinion.

A closer look at this expensive necklace (haha) reveals that is made of beads and silver bobby pins!!!!! Who knew!!

Definitely, a longer necklace is needed as Patty said. I created this piece so many years ago, the silver has tarnished and looks like copper now. I like the length of this necklace the best. Patty has a stunning, long, silver necklace that she wears. The collar length and the draping of the velvet are so perfectly suited for a longer piece of jewelry. How about diamonds!!! So, we choose, silver bobby pins or diamonds. Haha.

I purchased a 50″ x 70″ throw of Kantha cloth for this “dressy” COZY shown here. It is patched on the outside (each piece has embroidery on it) with a solid cotton on the inside, and both pieces are stitched together by hand in row after row of running stitches. One throw size (50″ x 70″) will make one COZY. I purchased mine from Walmart.com In the search bar, type in Kantha throw/bedspread.

The back shows off that beautiful embroidery that makes this COZY extra special and sparkly for any event you want.

A closeup shows how “imperfectly perfect” this Kantha cloth really is.

I’m so grateful for all of you showing up every Friday to see what I’m working on. Tell your sewing friends about my posts. And I love seeing pictures of what you have created from my “Art to Wear” sewing patterns. I also, want to show YOUR creativity to others in our sewing sphere. That is one way we can encourage each other. Take care now and have a CREATIVE weekend! Hugs and Blessings to you all, Heidi

This and That Friday!

by HEIDI EMMETT

I will trust that everyone had a great Thanksgiving! We all have so much to be THANKFUL for. It should be an ongoing thing, being thankful. So, onward we go then.

Stunning colors, in the hydrangeas this year.

It is obvious I can’t get enough of these beautiful blossoms. I promise, this is the last week I will show these.

Oops, I know I showed this picture last week too. I’m losing it my dear friends. I wanted to say, check out what I’m wearing, but I think I did that too! Sigh…..

O.K., this is new and different. I made a little bouquet of hydrangea blossoms and put them in a green, mossy purse! See the handle (there are 2)in between the blossoms. It was a hostess gift for where we went for Thanksgiving dinner yesterday.

So this is what I wore, my Mia Vest in Kantha cloth. I have shown it before but this time I paired it with a beautiful felted silk chiffon scarf.

Mia is a very fun vest, very loose fitting (appropriate for eating all that yummy food). Oh, yes, I did plan ahead for that, as well as elastic waisted leggings. I’m not proud. I’M PRACTICAL! Haha.

A happy and fun piece of Kantha cloth. The felted scarf is a nice compliment I think, for this Mia Vest.

I bought these Kantha Cloth pieces to make COZY’s, but I love my Mia Vest so much, I’m going to make another one out of which piece? Eenie, meenie, minee, mo?! I purchased all four of these from Walmart.com/ Kantha coverlet. Good quality, great choices, and good prices.

Mia, a vest sewing pattern from the “Art to Wear” collection of my Etsy shop: DesignsbyHeidiEmmett $15. plus shipping (tissue pattern pieces included). International orders, PLEASE contact me BEFORE purchasing. Email me at: hmemmett@gmail.com I will save you $$ in shipping.

This scarf is amazingly lightweight and warm too! And I LOVE the colors in it as well.

Let’s do the Empty jar/ fill it up with GOOD things. I’m starting mine this week. Why wait until January?

I am very THANKFUL for all of YOU who come every Friday to visit with me and see what’s going on in my world of Creativity. Remember how I used to say, 15 minutes a day to really get your project going? Why did I stop saying that? ‘Cause I wasn’t doing it myself!!! So, I need to practice what I preach here. We can do this! Hugs and Blessings, Heidi

A Rafiki Skirt for Fall? Let’s Make One!

by Heidi Emmett

I have to say that in the past, I would have said, Rafiki Skirt is perfect for spring and summer, but not for fall. Well, my friend Beth Watts from Fabric Chicks Creative Oasis thinks otherwise. I absolutely agree!

I made a Rafiki Skirt for Beth to display in her shop, Fabric Chicks Creative Oasis in Gardnerville, Nevada. She wants to pair it with leggings and her boots. I’m going to suggest a long sleeved T-shirt and a jean jacket to finish off the look. But first we need to start with the right fabrics. She picks them out and sends them to me. I go from there.

Beth and I are teaming up to teach Rafiki Skirt in January, 2024. So go to Fabric Chicks Creative Oasis and be one of the first to sign up. ALSO, go to her FB page or Yube Tube Channel of the same name to see the fun interviews, demos, and fabulous sales of fabrics, notions, and trims, and auctions (I missed bidding on a beautiful quilt), EVERY SINGLE WEEK! Stay as long as you like. It’s easy to buy what you see. Beth tells you how to do it at the beginning of each show. Spend $85. (online only) and receive FREE, yes, FREE shipping. And if you can’t stay the whole time, no worries. View it again on her Yube Tube Channel, orrr…FB. People from all over the country tune in. It is a hoot to watch as it is very easy going. I work on hand work while I tune in. It’s like being with a bunch of friends and seeing new and fun things.

Beth sets up the classes I teach (it’s zoomed to you), and I do the teaching. Rafiki Skirt is a fast and easy skirt to create. And so much fun to pick out 7 favorite fabrics that will go together. Let’s check out my first really Fall inspired, RAFIKI SKIRT.

Here are the leftovers from the 7 fabric pieces you will need to have to create a “Fall Inspired Rafiki Skirt.” 5 of these 7 fabrics are from the fabric designer, Marcia Derse.

The skirt is made up of 8 different panels( four are shown here), using all 7 of the 7 fabrics. It is explained in the pattern instructions how easy this is to do. It just looks kind of hard.

Here are four more panels.

Taking one from each group to make up the skirt front/or back. And then do it again. Sew all 8 panels together and make a casing at the top and hem the bottom. That’s it!

I want my very own Fall inspired Rafiki skirt. Add a t-shirt, turtleneck, a pair of leggings underneath and your favorite shorty boots. Perfect for anywhere! I would be wearing my joy.

No time to take my Rafiki Skirt class (pattern is purchased with the class), order it via my Etsy shop (click on my Etsy shop via Pinterest) , or email me directly at hmemmett@gmail.com and work on it yourself .

A closer look at my Rafiki Skirt sewing pattern in a Fall look.

Closer still, a look at Rafiki Skirt. Check out the pattern here

Make this skirt, Rafiki Skirt, using your own measurements to get it just right for your body shape. It’s easy. Go here to learn more about DesignsbyHeidi Emmett and my Rafiki Skirt sewing pattern.

Fall flowers are the very best! The colors, so deep and rich.

This thistle blossom looks otherworldly. I LOVE it!!!

The view right outside my kitchen window just a few days ago. This was taken at 7:45a.m. on November 15th, looking south east. A red maple make me so happy. I so appreciate each of you for following my Newsletter/Blog to see what I’m up to. The rain is coming in this evening, and for the whole weekend. A great time to sew. I hope you get some creative time this weekend. Sewing, crocheting, knitting, embroidery, beading, the list goes on. Pick one and have FUN! Hugs and Blessings to you all, Heidi

Wearing My Joy, even when it’s 30 years old!

by Heidi Emmett

O.K., WHAT does that even mean? In case you didn’t know, I sometimes put a picture of myself wearing something that I have created onto Instagram. When I post it, I call it “Wearing My Joy” because I truly feel happy and joyful when I wear it.

This vest is pretty old I must admit. I made it 30 years ago! I have a very vivid memory of working out the design for all these striped fabrics. I needed to look at all the stripes from a distance so I did it on the floor of my teeny, tiny, sewing area off our kitchen (this teeny, tiny, room is now my office). I wove some of the fabrics in and out and others I put in as patches. I had to be very careful with pins and scissors because our son was 2 years old at the time and interested in everything.

I remember that I was so happy and joyful to have a whole hour of creative sewing time (Cory was taking a nap).

I love how all the vibrant colors came together. It is just a little bit smaller now, but I saw it on the top of the “Fall/winter vest pile” in my upstairs closet and said to myself, “what can I pair this with to make it perfect for right now?”

And here’s another version of how to change it up. And yes, remember my rain boots? They are by Nomad.com just in case you need your own pair. I had so much fun creating this vest (above) that I want to make another garment using this technique. It is my own fabric turned into a “Kantha cloth” of sorts. It has a filling (cotton batting) though. So, 3 layers. True Kantha cloth has only 2 layers.

I’m thinking my COZY pattern might be really great. I need 50″ x 70″ to create one COZY. Hmm…that’s pretty big for all that I want to do. Check out my COZY pattern at my Etsy shop. Go to Etsy.com and type into the search bar, DesignsbyHeidiEmmett to get to my shop.

I think my Zephyr Jacket pattern would work really nicely too. And not too much fabric to create and I’d still have a jacket. And I would make the whole jacket in the same handmade Kantha. And add pockets. Definitely, pockets.

Right off my back deck. A few straggler leaves are all that’s left. It has been a FABULOUS, COLORFUL, fall season.

The above are sentences we can say when we don’t want to talk about anything else but sewing and creativity! It will stop whomever in their tracks. Haha.

Thanks so much for stopping by. You are so appreciated. Oh, here is one more thing I just read yesterday at Roxanne’s Blog (her shop is in Carpinteria, CA) , “TOO BLESSED TO BE STRESSED!” Hugs, and Blessings, Heidi

A Special “Upcycled” Pocket Pillow.

by Heidi Emmett

I had to add in a couple of fall pictures first, because I can. Thank you, for stopping by to see what I’m up to this week.

You know me and my leaf closeups. I went out to the backyard and zeroed in on the brightest colored leaf I could see in that teeny tiny screen.

Cozy kitty (Rubix), pretty pumpkin, prettier leaves on the back deck. I have a story about the pumpkin outside our front door. It was larger than the one in this picture. On October 20th, my husband came in from walking our Riley dog and asked, “Why did you move the pumpkin?” I didn’t move it. We looked all around the area and finally found it under a bush. And you’ll never guess, but the top had been chewed off EXACTLY the way you would start your pumpkin carving ritual each year. And on closer inspection, it was perfectly hollowed out too, I mean, PERFECTLY! Every bit of the pulp had been removed except a few seeds clinging to the very bottom, inside. I found the top too, but it looked super gross, all chewed up and spit out a few feet away under another bush. We decided it had to be a deer? Still kind of a mystery. In 37 years of living in our home here on this property we have never ever had something like this happen. Onward to the special pocket pillow project.

Here’s the back story: A friend, Heather, approached me about making a pillow for her friend, whose husband, a rancher, had passed away. Heather wanted his shirt pockets to be put onto a pillow for his wife as a remembrance of her husband. Heather gave me these 5 shirts and a pillow form. I was up for the challenge.

Taa daa! Here is the finished pillow. And what a beautiful bench the pillow is sitting on. My husband created this bench for ME a decade ago. He used a “pattern” and bought all the supplies, and (ha,ha, I truly wrote, stitched and ironed).It is supposed to be “sawed and hammered.” I LOVE, LOVE, LOVE, it. He just finished repainting it so it looks brand new. Good for another decade at least. Thank you honey. And did I say it is comfortable too, with or without a pillow.

Here’s the back of the pillow. I chose a more “feminine” leaf jacquard (leaf pattern is WOVEN into the fabric) denim for the background and I used the front snaps(from the shirt front) for the opening to get the pillow form in and out instead of a zipper.

When it comes to upcycling, I try to always get the most out of any piece I cut up. I look at it closely and decide how best to use important pieces. In this case, I cut up the side seams, around the sleeve, and across I left extra fabric around each pocket, as I wasn’t sure how I would finish them. I cut extra when I cut the front snaps off. Again, keep it all in one piece.

Here, I’m moving the pockets around on the original pillow front, just to get an idea of how many to use.

I knew I wanted to use the back of one of the shirts for the pillow front. Keeping to my idea of cutting the largest pieces I could, I had just enough for the background of the pillow front. This shirt was too light weight to stand alone so I added a piece of muslin behind it (it’s peeking out the bottom.

I had a hard time deciding whether to tuck the outside edges of the pockets all the way under, or leave the some of the background fabric exposed. I really like the snaps from the shirt pocket becoming the pillow opening area. I only had to sew it twice, haha,as I had trouble figuring out how to sew it in so that when the snaps were pulled apart I could see the feather pillow form. First time it didn’t work I laughed and laughed. Second time, NOT so funny. I persevered. Back to those pockets….

I decided to leave some of the backround fabric showing. It made it easier to stitch the pocket on (no bulk) and I liked the way it looked too.

I am really happy how this “remembrance” pocket pillow turned out.

Please check out my piping detail (outside edge). I haven’t done piping in at least 2 years. It’s kind of like riding a bike, really. All the little details on how to proceed came back as I stitched it in place. If you want to try “sewing with piping”, just type it into YouTube.

Looking off my back deck at 9:30a.m. today. Rain coming in on Sunday. If it’s raining/snowing your way, it would be a good time to visit my Etsy shop. Go Etsy.com, and in the search bar, type in, “DesignsbyHeidiEmmett” My shop will pop up and you can peruse the “Art to Wear” patterns I sell. Questions? Email me at: hmemmett@gmail.com Hugs and Blessings, Heidi

COZY! The Word is Out!

by Heidi Emmett

Hello to all of you on this Friday from sunny, but very cool morning (41 degrees F.), Cedar Ridge, CA, population 227. Elevation, 2,890 feet.

I’m on cloud 9, doing my happy dance, and I feel like a fluttering butterfly with colorful wings.

My COZY pattern has officially been out there to the public for 1 year now. I am so happy to report, it is my #1 seller in my “Art to Wear” pattern lineup!! THANK YOU to all of YOU who have put it on the map.

Well, well, look at my butterfly wings! A huge thank you to Jo from Chico, CA who was my “groupmate” (groups of 4) at September’s Zephyr Point Art Retreat (quilting) and finished this quilt top while there. It’s Tula Pink (fabric and pattern designer) all the way. It took Jo, 2 months to create this top, WHILE working on other projects! as well).

Oh, yes, I’m wearing my COZY (it’s the one from the front cover of my pattern)! I think it’s so fun the way the lower wings of the Butterfly quilt top “flow” into my Turquoise COZY.

A picture (not a good one, sorry) of the book she got the pattern from.

The same turquoise Kantha cloth COZY in the Butterfly picture, is featured on the front of my COZY pattern. A few facts about this pattern: You will draft (easy, 45 min. tops) 4 rectangles using the measurements I give you. It is made out of Kantha cloth (2 layers of fabric, whether pieced or not, held together by large running stitches, row after row of these stitches). Buy the COZY sewing pattern directly from me (email me): hmemmett@gmail.com or, go to my Etsy shop and purchase it there. My Etsy shop is: Etsy.com/DesignsbyHeidiEmmett Both private or Etsy shop are able to send either, “hard copy” (includes all instructions, cover, in plastic sleeve, sent snail mail) or as a PDF/digital copy (exactly the same as the “hard copy” but you print it out yourself).

Taa daa! One of the latest “COZY’S to hit my “in” box. I LOVE getting pictures of the COZY’S you all have created! This COZY is from Maggie G. of Glousteshire, England. This is a lovely Navy colored Kantha. Maggie gave a great reminder to check your Kantha cloth first to see if the design goes “one way” and cut out accordingly. Here is what she wrote to me with this picture:

Thought you would like to know I’ve successfully finished my Cozy  jacket.  Found pattern to be easy to follow, perfect size and no changes made. Love the big pockets, perfect for dog treats!  I’ve Kantha quilt ready to make another! This time I will not attach the collar, so if I get too warm I can take it off.

Here are Terri P.’s COZY’S. There is not just one, but 3 OF THEM!!!!!! Terri is from Caroline Beach, North Carolina. Here is what she had to say, but first, look at the single pocket, with the little turquoise patch. And the lovely magenta lining. All rightie then this is what she says about the COZY: “Several weeks ago, I purchased your beautiful Cozy pattern.  Since then I have enjoyed making three of them.  The first one was a little large, so I modified the pattern to make it about 3 inches narrower.  Your pattern is awesome!  I have attached pictures of the three I have made, so far.”

This is Terri’s #2 COZY. She really took her time to think about where designs from the Kantha cloth might land. Once again, great colors in this Kantha piece.

Here is #3 in her COZY line-up. A black background automatically makes this COZY look a bit dressier. 3 COZY’S just like that!!! You go Terri!

Speaking of a black background I want to show you my own latest COZY. I used an embroidered Kantha twin sized piece (some leftovers, yea.). At the end of these pictures, I want to give you a few ideas of where you might purchase your Kantha cloth.

The top layer of this Kantha is pieced and EVERY PIECE has DIFFERENT embroidery on them. Each piece is a little piece of art.

Some of the pieces are machine embroidered and some were created by hand. The inside of this piece is solid black. DesignsbyHeidi.wordpress.com Visit my Etsy shop to see all my “Art to Wear” patterns. Etsy.com/DesignsbyHeidiEmmett

Don’t you just love the contrast of the intricate embroidery with the wonky running stitches on the top? I love it as it really shows that it is hand made.

I really “crunched” the collar together at the bottom(orange and royal blue embroidery). Many ways to wear the collar with this COZY.

O.K., these are the places I have purchased my Kantha pieces:

1. Etsy. Slower delivery, rarely get to pick what you want (they like to sell them in lots of 5,10, or more). Cost more for a single one and sometimes they are quite thin. Unique, yes, but wont have that lovely drape. Thin though, is perfect for a summer beach coverup or a summer cool evening topper.

2. Ebay, another source. Check where they come from (if it’s India directly, expect a l-o-n-g wait). And you need to ask questions, ALWAYS ask questions. Home Goods, Ross’, Wayfair, Quilt Shows, just to name a few places to try. If you live in a larger town or city, there are probably many out of the way places to purchase. This applies also to all my international customers. It’s always the thrill of “the hunt” for me. Oh, don’t forget Thrift shops too.

3. I have had good success at Walmart.com (online ordering only). Type in Kantha coverlets and 10+ pages will pop up. Shipping has been fast and often FREE if you spend some $$.

Another big thank you to both Maggie G. and Terri P. for sharing their Kantha, COZY’S with all of us.

I so appreciate your stopping by today. Now, let’s all get our COZY thoughts together and create one! Hugs and Blessings, Heidi

Fall is REALLY Here! Let’s Celebrate!

by Heidi Emmett

Hello my sewing/quilting/repurposing/embroidering/felting/knitting/crocheting, FRIENDS! Thank you for joining me this week. Last Saturday, October 14th, I was able to attend the PIQF show in Santa Clara, CA (near San Francisco). PIQF stands for “Pacific International Quilt Festival. Enjoy the following pictures. More to follow in upcoming posts.

This quilt is so realistic looking. It really took my breath away. So much sew that I FORGOT to take a picture of owner/maker of it! Apologies, apologies. It really captures the Fall season we are enjoying right now.

I call this a mixture of Collaging, Piecing, and Thread painting.

Really look closely. The falling water is more thread painting. And now, have your eyes follow through to the quiet pool in the middle right. And travel now to the bottom portion of this quilt. The water at the bottom is very cleverly mirroring what is way above but in a quilt looking manner!

And then I just noticed it AGAIN in the waterfall above. Very subtle from a distance. But the quilts are there. Go back to the first picture again and you will really see it. This is an incredible Art Piece.

Here is another non-traditional quilt. Collaged and more thread painting.

There is also some fabric painting (the feathers most definitely).This quilt doesn’t have the depth that the “Mill Quilt” has, but it is lovely to look at.

This picture was taken from my back deck looking into our neighbor’s Christmas Tree Farm. The small throws in foreground are “Vintage” made with Granny Squares. Each square is about 3″ square. I have a clothing idea bouncing around that will use one of these. Come back and check out a future post to see if I follow through on this.

Yep, my brain is bouncing all around today. Maybe it has to do with a Bug/Spider bite I received yesterday, haha! Not funny at the time. I was with a large group of ladies. I love you all, but WOW, many, different ideas about what to do. Thank the Lord, mine didn’t look ANYTHING like the DISGUSTING pictures on the internet. Sometimes I think those pictures are the absolute WORST pictures that they can find, just to scare us. Ice, ibuprofen, and antibiotic ointment, and almost 24 hours later, it just looks like a bruise ( A large bruise on the inside of my knee). Yes, I was vigilant, and that is important, ready to go to urgent care if needed. Phew, I didn’t. O.K., back on track. Check this out! This picture below is from a booth at PIQF.

This booth was called by Georg! Fiber and Design. The pieces above are from a scrap bag I purchased there. This is Eco-dyeing on silk noil. Ohhhhh my GOODNESS! I was in love!

A close up of one of the scraps. I really have not seen such clear Eco-printing pieces before and with all these extra details. Georg also had beautiful fun-felted pieces as well. Oh my gosh, you know how I love felted work too. I’m saving those pictures for another time.

And another so-called “scrap” piece and I already know how I’m going to use it. I wish she taught classes. It would be so fun to try this method. But, we have You Tube, so let’s all check out Eco-dyeing.

I’ve been seeing and hearing about kitties, and kittens lately. Good stories, rescue stories and kitties in general. So, I leave you with a few things I found on Pinterest.

That was me yesterday with my bug/spider bite. Haha.

Awwwwwww! Too cute!

One of my brothers sent this to me. I laughed and laughed because that is exactly how we (my brother and I) talk to our kitty cats. Say it out loud and you too will remember doing it. “Pspspsps”

This is ABSOLUTELY me in every way. Thank the good Lord that at least it hasn’t been a snake, BUT, mice (several over the years), and lizards (many of those), all were alive and moving AND IN, YES, IN THE HOUSE! The last one, a mouse. I closed up my office, and stuffed clothing in the bottoms of the doors (two entrances) just in case they could squeeze through 3/8″ under the door, and screamed at my husband on the phone, to hurry home before it got out and crawled up my leg! He was in a meeting at the time. Yes, he repeated everything I said so that those in attendance could hear. I heard LOTS of laughing in the background, BUT he did come right home. Thank you honey! Mouse was saved (I told him not to kill it). Oh dear, I think I told this story before, oh well.

I took this picture at Sammies Friends, the Thrift Shop I work at on Monday mornings. This is Lola the resident kitty cat. THIS Bear is Lola’s bear. There is a note on the Bears ear that reads “Bear Not For Sale, neither is the Cat!”

Maybe you have some “way cool scraps” hanging around in your sewing area. What to do with them. Look at past posts I’ve written. Go back to the home page, here, on this site and look for the “Categories” box. Click on whatever you want and past posts will pop up. Be inspired and wowed, by what has been created. Things created by me and lots and lots of YOU, my sewing friends. Hugs and Blessings, Heidi

Fall is in The Air! Let’s Make a Zephyr Jacket! or Two or Three!

by Heidi Emmett

I am always so happy when fellow sewing enthusiasts send me pictures of what they have created using one of my “Art to Wear” sewing patterns.

I’m showcasing my Zephyr Jacket this week. And if you need even more info. about it, go to the home page of my Newsletter/Blog DesignsbyHeidi.wordpress.com Look for the “Categories” box. Click on Zephyr Jacket and past posts will pop up. Learn new tips and tricks for your own Zephyr Jacket. Let’s see how my Zephyr Jacket pattern was interpreted this week.

These pictures JUST CAME IN from Casey T. of Texas. Her note to me went like this: ” It turned out beautifully!! Can’t wait to make some more quilts to do one for my mom!! Thank you Heidi!” Casey made this Zephyr from a quilt she had already created.

I really like how Casey use an all over quilt for her first Zephyr Jacket. It gives a really cohesive look to this “HOT, HOT” look right now. GREAT JOB CASEY!!

Here is my Zephyr Jacket using a Kantha Cloth (queen sized piece) for it. I too, kept it all in one fabric. Kantha Cloth is 2 layers of fabric held together by long running stitches. In this case, a black printed fabric on top with a solid black on the back. The running stitches alternate with a few rows of black, then white stitching.

I love the longer back for extra warmth as well as “hiding” hips. Zephyr Jacket, see it at my Etsy shop: Etsy.com/DesignsbyHeidiEmmett

Here is Zephyr Jacket using a lightweight cotton (Kaffe Fassett) for the body and silk (cut from a pair of pants) for the front pieces.

The black Kantha was so much fun to make (and FAST! too) that I made it again with another Kantha piece. It has patch pockets on the front AND I made it longer so it is more like a coat now.

The print side of this Kantha has actually been pieced. Great with jeans don’t you think?

A little detailing at the shoulder seams and a great close up showing the “slow stitching” of the Kantha piece.

One more jacket. I cut up an old quilt that had some large stains. I was only able to cut the main front pieces and the whole back piece from the quilt but found a larger scrap of a solid front and back Kantha piece (the 2 shades of blue)for the Zephyr Front pieces.

I think its a fun look and the “off set” cutting up of the quilt gives a modern look to the whole jacket.

I really appreciate each of you visiting my Newsletter/Blog once a week. Writing these posts and keeping tabs on all your creative work using my “Art to Wear” patterns, makes my sewing and creative adventures that much more fun too and I feel inspired to KEEP ON CREATING! Hugs and Blessings to you all! Heidi

Artist Retreat, Lake Tahoe, QUILTS Coming Out of Our Ears!

by HEIDI WEISS EMMETT

There were 5 different disciplines to choose from at this Artist Retreat. I chose quilting (I sew clothing mainly but I quilt also).

There were 31 of us in the largest conference room they have at the Zephyr Point Conference center. We were put in groups of 4 with each of us having our own 6ft. table. Within 5 minutes after getting all organized, I felt like a TOTAL beginner “quilt piecer” sitting next to my table mates. You will see what I mean in a few minutes.

I’m walking on the pier to check out the clarity of the water at Lake Tahoe (they say it is the clearest it has ever been. Something like 35 ft. down). I’m wearing my Mia Vest. It has pockets everywhere. Even one in the back (part of a shirt sleeve). P.S. The smoke in the upper right picture is a “control burn.”

The front (better lighting) of my Mia vest shows off some of my denim upcycling. The fun part about all these “pieces” on this Mia Vest is, if I find a stain anywhere on the background denim jeans that make up this vest, I can just add another swatch of whatever and slow stitch it down.

Visit my Etsy shop: Etsy.com/DesignsbyHeidiEmmett to see all my “Art to Wear” patterns. Or email me directly at: hmemmett@gmail.com

A poor picture set up on my part but no time to edit. Just look at the crystal clear water, and the main view. Don’t look at the smoke, dead tree (they really need to get that out, and the road in general. Sigh… I’m hanging over the side deck of our conference room, right outside of the building we were sewing in. I just can’t get enough of this AMAZING view. And the FRESH, CLEAN, air!

O.K. let’s take a look at the 2 “baby quilt” tops I completed while there. And I’m happy to say, I cut out and got 1/2 way through a 3rd wall hanging too (I’ll show that another day).

My tablemates named this one “Sunset” in honor of Lake Tahoe. The water is sometimes exactly the color at the bottom of this quilt.

And here is my second baby quilt. I think it is so sweet. O.K., O.K., both of these were kits! I USED to think that kits were cheating but NOT ANYMORE!

And here are the patterns I used. They were great fun to make and very relaxing too. My tablemates were very generous with their compliments toward my efforts. They are my new best friends. Haha.

Now onto the quilting and the BIG TIME TALENT of my 3 tablemates.

Let’s start with Jan, tablemate #1. A closeup of Jan’s first quilt. She cut this out and sewed it up in RECORD time! Like one and a half days max.

She used a Jelly roll. I love it. And now I want to make one too. I said that at least 21 times during the week.

The pattern is called “Stamp Roll.”

And then she whipped out this “little” border (I say that sarcastically as the whole quilt will be HUGE!) she has been hand appliqueing. I LOVE THIS!!!!

I’ve not seen before, a beautiful applique’ quilt made with a pretty dot background and all the Kaffe Fassett fabrics.

I don’t have a picture of the rest of the quilt because she didn’t bring it! And the cool pen Jan used for placement of each applique’. I will find it in my notes and get back to all of you. It comes out of course.

Here is Judy working on her applique’ borders. She is on her LAST border for her entirely hand appliqued quilt.

Isn’t it FABULOUS!! Her quilt is entirely made using Batik fabrics. Both Judy and Jan use their home sewing machines to quilt these themselves! Ohhhh, my aching back, neck, fingers, no way no how for me!!!

A completely new look when someone holds it upright. These girls really know what they are doing. Now, on to Jo and her quilts.

Jo is working on the same quilt pattern as Judy but in lovely Fall colors. She LEFT HER QUILT AT HOME!!!! So I got this off her phone. She also has a couple of borders to finish.

BUT, Jo did bring THIS FABULOUS quilt!!! One section is done and up.

I can’t find my picture of the whole quilt book that I took. I grabbed this one off of the Tula Pink site. Jo has used all Tula Pink fabrics from her own stash, except a couple of pieces. Let’s see a picture of this quilt FINISHED with the “maker” in front of it! It is a sampler quilt too. Means lots and lots of different blocks within the quilt.

Every time a quilt top was finished, it was taken up to the stage and they were “oohhed and ahhhed” over and clapped for and pictures taken. What validation for the work that everyone put into their quilt tops.

It is so BIG and BEAUTIFUL! Congratulations Miss Jo! 2 months. Wow oh WOW!!!

Thank you so much, all of you who have stopped by. I really appreciate each and every one of you! Find some time to sew and/or create this weekend. It can be so satisfying. Truly. Hugs and blessings, Heidi

A This & That Saturday!

by HEIDI WEISS EMMETT

Hello all. What’s this about a Saturday post? I didn’t come home until late in the afternoon on Friday, that’s why I am doing a quick post today. I will post much more about my week away on October 6th.

Of COURSE! Right out of the gate, I have to have a commercial break. But people!!! Look where I am!! On the shore of Lake Tahoe, South Shore area, the Nevada Side. Zephyr Cove is right behind me. Cave Rock is in the upper left side, the rock looks sheared off. It is the only drive through tunnel on the shores of Lake Tahoe. Here is a picture of me in my latest COZY!

Well look at this picture! Ha,ha. It was taken about 3 ft. to the left of the picture above. Please visit my Etsy shop: Go to Etsy.com and in the search bar, type in DesignsbyHeidiEmmett. Learn more about my “Art to Wear” sewing patterns. “Hard Copy” (everything included and sent via mail) $15. US plus shipping. Or.. buy it Pdf/Digital (everything that comes in a hard copy) sent as a downloadable file for $10. US

Tried a picture in the full sun. I’m looking for the Dixie Queen paddlewheel boat to come in to Zephyr Cove (behind me and to the right).

The beautiful black Kantha cloth (heavily embroidered as well as stitched with long, slow stitching is from Walmart.com (online ordering only). Many of the Kantha cloth bedspreads (this was a twin sized) are all sourced from India. L.R. Resources (the company that sells these beautiful one of a kind Kantha pieces via Walmart.com) runs a school for under privileged children in rural India and this has led to many kids going to school for the first time without putting any financial burden on their families.

We are at the Zephyr Point Conference center on the Eastern shore of Lake Tahoe. This picture was taken from our dining room at 8:00a.m. on Sept. 28th. I am standing behind my chair looking to the left. The mountain you see straight ahead is about 9,200+ ft. high. Lake level where I am taking this picture is 6,300ft. At this point from this shore to the other shore (near Emerald Bay is 11.5 miles away). As you can probably tell, I love all things Lake Tahoe! Go ahead, ask me a question. Haha. Oh, one other cool factoid: less than 5 miles to the south, Samuel Clemens (aka Mark Twain) nailed his paper claim to a pine tree in the late 1800’s. His brother told him he needed property near his. So Mark came, claimed, and almost burned down a whole forest of trees, because he didn’t know how to properly build a fire for cooking. Suffice it to say, Mark Twain gave up his claim!

Still in the dining room, I turned to the right and Cave Rock is seen at the top, almost center of the picture. See that bench in the top right? Walk behind it and drop a pretty steep 15 ft. and you’ll be right where we took those COZY pictures.

O.K. the ride back to Grass Valley, CA was a series of stop and go traffic from the east to the north shore of Lake Tahoe. Hence the late time arriving back to Grass Valley. How does this tree even grow where it is, with all those exposed roots?

See what I mean? About those roots. When I say stop and go traffic I mean mostly STOP with very LITTLE GO! But tell me my friends, where in the world could one have better views to be stopped at than the Eastern shore of Lake Tahoe!!! Just so you know why, they were repaving about a 1 mile+ stretch of two way traffic that is literally right on the edge of a cliff. VERY LITTLE shoulder. I was totally concentrating on driving. No chance for more phenomenal pictures (Carnelian Bay and Mount Rose in the distance). Thanks so much for stopping by. More about why I was there next week. Until next Friday then, get some time, no, MAKE TIME, for YOUR OWN creative adventure. Remember, 15 min. a day can really add up! Hugs and blessings, Heidi